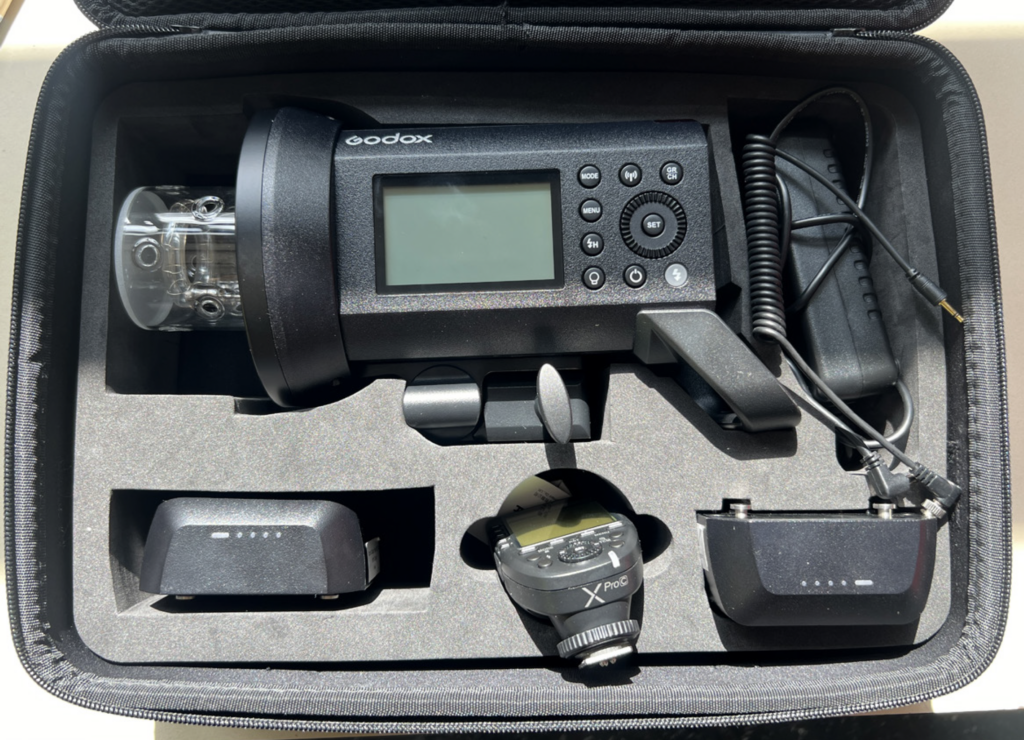
Inventory For Each Kit (x2)
(1) 1 AD400Pro Monolight
(1) Wireless Flash Trigger
(1) Cable Tether
(2) Batteries
(1) Charging Cable
You will also need (per kit):
(1) Tripod
(1) Sandbag
Light Diffusers
The strobe is a very strong light, and by itself can sometimes be too bright and direct, creating harsh shadows. This is when we attach different kinds of diffusers to evenly disperse and control the light.
- Beauty Dish: A reflective bowl that goes around the strobe, reflecting the light to a focal point to add a more contrasted look and dramatic effects to an image.
- Softbox: Diffuses light by sending it through a translucent material or reflecting it off of another surface. It can be used with either flash or as a continuous light source. (Fig. 1).
- Bounces: These don’t attach to the strobe, but they can be used to reflect light (bounce it around) to reduce shadows! This is one reason photographers have assistants or collaborate, so someone can hold the bounce (or sometimes the model will do it).
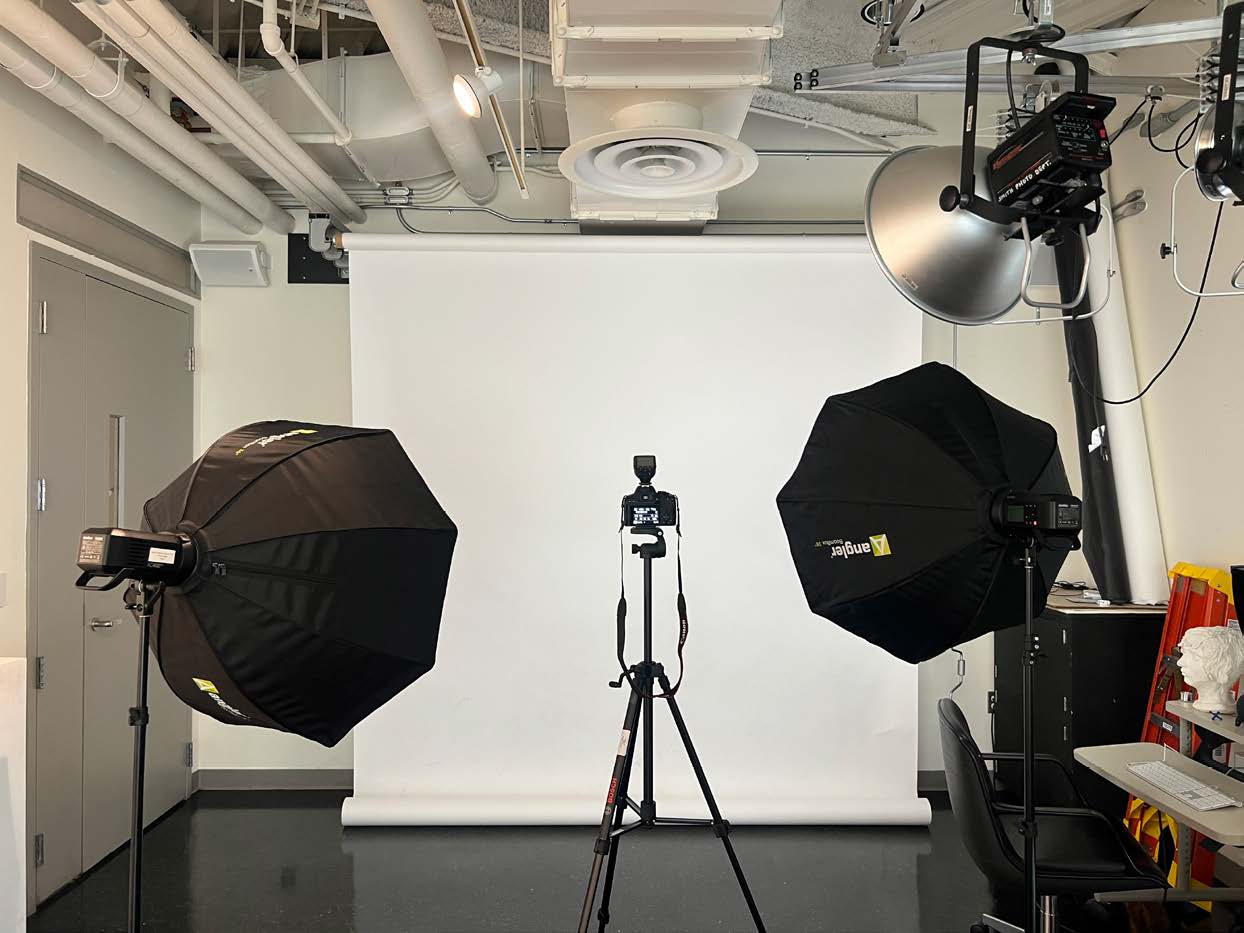
Setting Up the Strobe
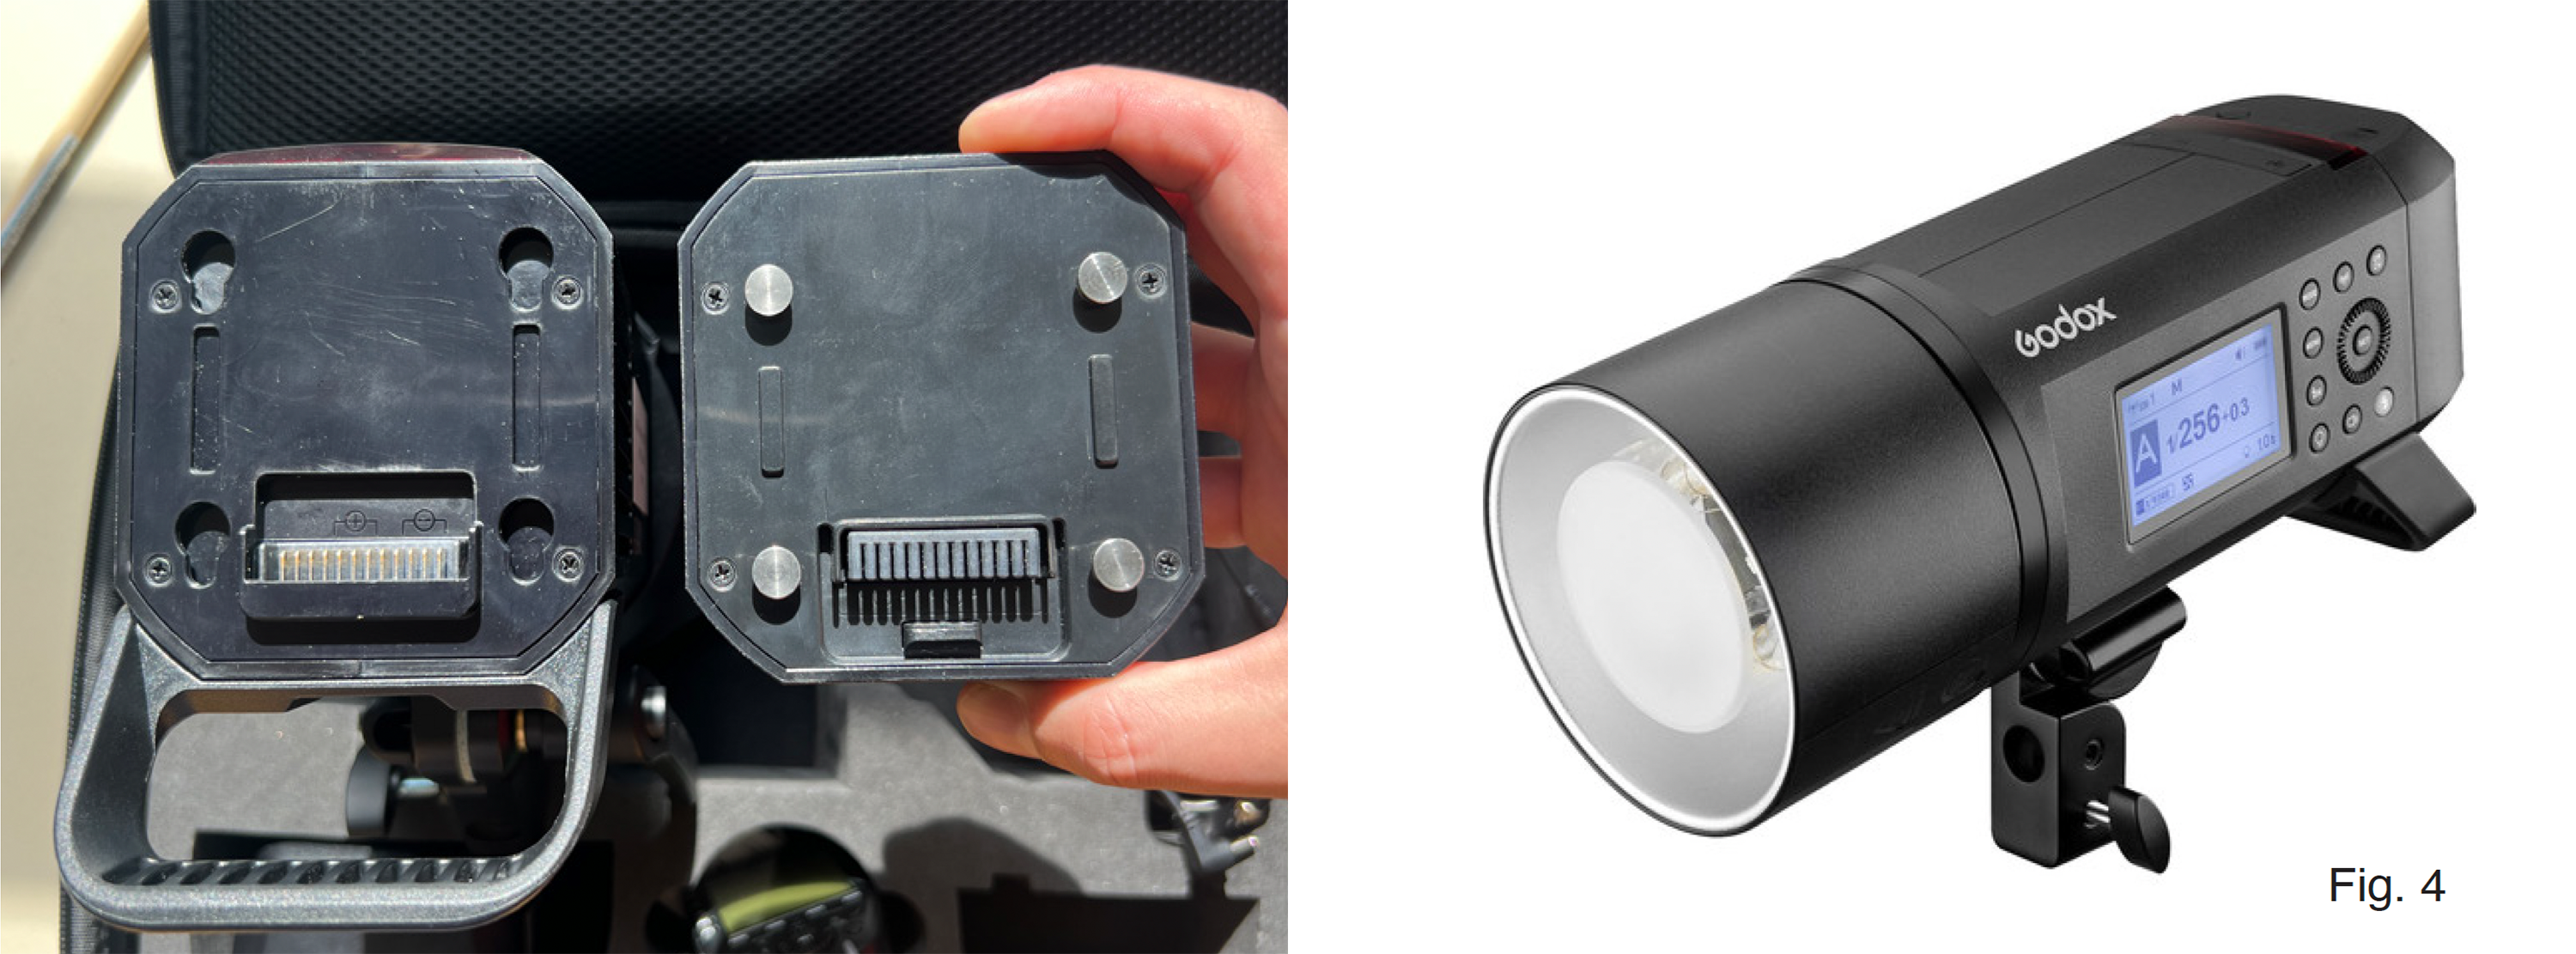
- When setting up the strobe, first thing you will want to do is make sure your batteries are charged! The last person to use the kit should have charged them, but it never hurts to double check. Each battery slides into the back of the monolight (Fig. 3), and press the power button.
- Take out the tripod and extend the base legs. Raise the main rod to a height easy for you to reach. Place one sandbag on the extended legs to support it. This way the tripod won’t fall over.
- Take out the diffuser. Beauty dishes are ready to be attached to the monolight. Softboxes will be collapsed and look like a closed umbrella. Open it and lock the inner wire support in place.
- Take the monolight and attach it to the back of the soft box, which you should have face down. There are three prongs that should align withthe front of the monolight. Rotate the light on the back on of the diffuser until it clicks into place. It is then ready to set up on a tripod.
- Put the monolight onto the top of the tripod via the base (Fig. 4). Use the screw to tighten the monolight base and secure it to the tripod.
- Repeat steps 1-5 for the second strobe.
- Attach your camera to a third tripod.
Pairing Flash Trigger & Key Light
The wireless flash trigger and monolight have several modes. This allows them to work in sync with the camera or independent of it.
- M – Manual: allows you to fully control the amount of light the strobe puts out via the length of the flash.
- TTL – Through-the-lens metering: Through-the-lens metering, meaning that the strobe will adjust the length of the flash to compensate for the shutter speed of the camera.
Go to the wireless flash trigger on your camera (Fig. 5). The on/off switch is on the right side. Letters A-E will show all of the strobes the trigger is paired with. You can adjust the mode (M or TTL) from here or on the strobe. Press the button next to the corresponding letter to switch to that strobe. The flash button on the bottom left allows you to manually trigger the flash independent of the camera shutter.
You can also adjust the brightness of each strobe using the dial. The numbers correspond to fractions (like shutter speed), along with decimals that more finely adjust the strength of the light.
The CH button on the strobe (Fig. 6) allows you to switch channels and make adjustments remotely to each strobe. Make sure that the letter (A-E) on the strobe and flash are matching, otherwise you won’t be able to sync the settings
You’ll want to put the key light in manual mode. This is usually the first light you set up to highlight the subject. That way it is a constant light, so you can adjust the other strobes as needed for exposure and shadows.

Camera Set-Up
1. Your shutter should generally be set to nothing slower than 1/60, as that can pick up movement from you (unless you’re using tripod) and the subject.
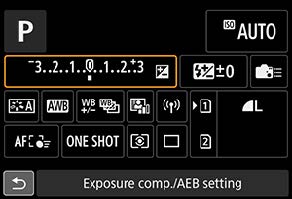
2. Check the white balance by accessing the main menu or pressing the “WB” button. Auto White Balance (AWB) will adjust for the strobes (Fig. 7).
3. Start off at 1/125 or 1/250 with f/8 and 100 ISO. Take a few photos to see if you need to adjust the key light (Is it too dark? Too bright?). The TTL will adjust automatically as you change your shutter speed. Be prepared to adjust your settings as needed.
4. Make sure to charge the second battery while you are photographing! The last thing you want is to switch out batteries and discover that both are depleted.
External Light Meter
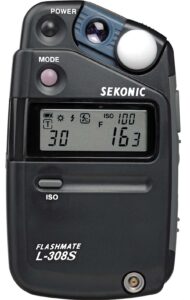
The Imaging Center has several Sekonic external light meters available for use (Fig. 8). Adjust the ISO and press the side button, this will tell you what shutter speed and aperture are needed for an even exposure. Use the additional side buttons to change the latter settings. You can trigger the flash via the light meter by using a cable to connect it to the camera, and then press mode to switch to cord flash mode [c].
- Incandescent (white bulb): Place in front of your subject, facing the light, to get an accurate reading.
- Reflective (open lens): Place in front of the camera facing the subject. Primarily for landscapes and faraway subjects.
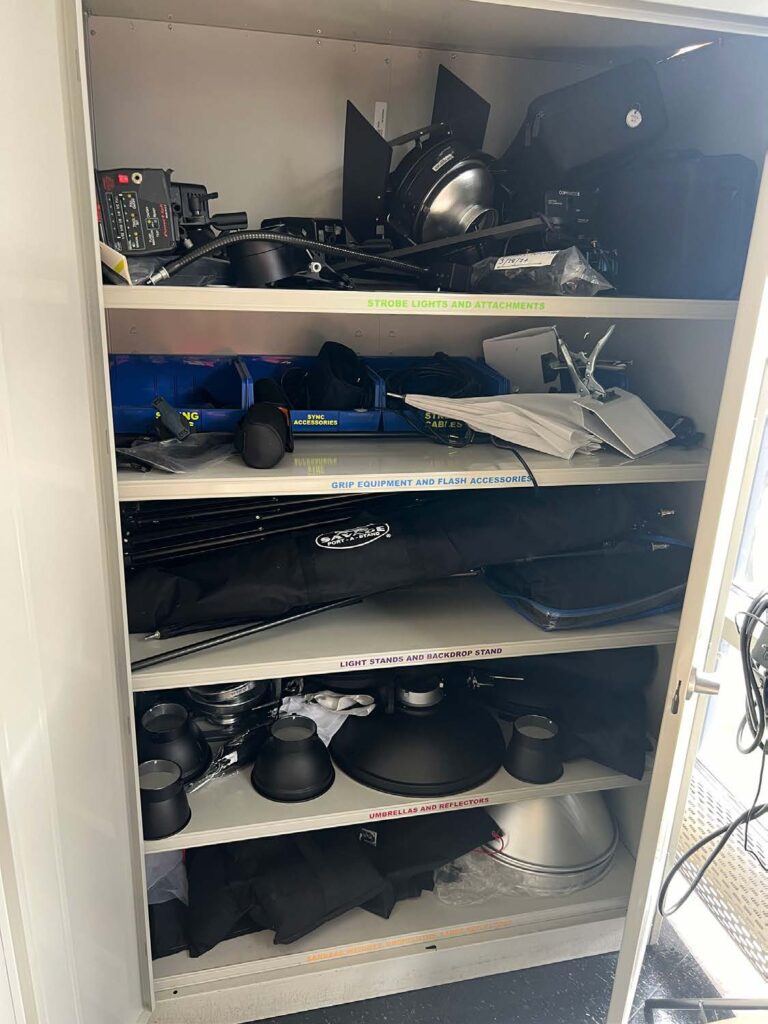
Breaking Down & Packing Up
- Turn off the equipment!
- Be careful when removing equipment from tripods or separating the diffuser from the strobes.
- Put all equipment back in their respective bags and store in the closet on the appropriate shelves (check the labels!). Don’t leave loose wires/charging cables around, they can be a tripping hazard.