Setting Up
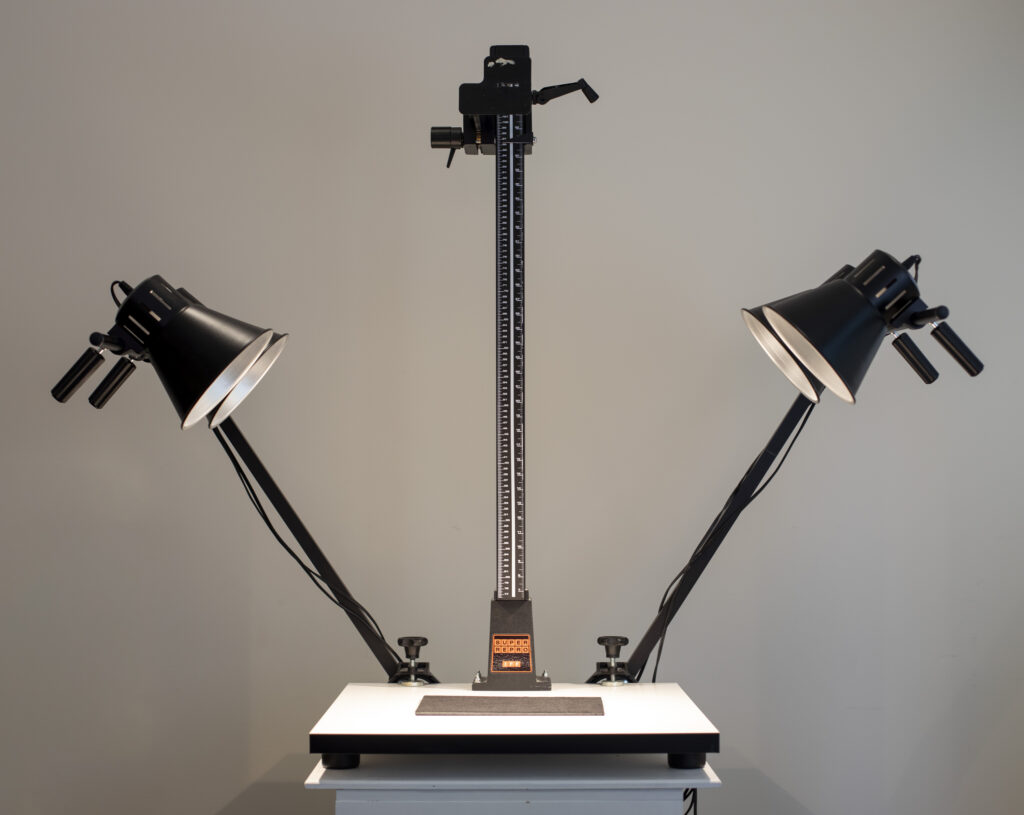
Stand Setup
- Shut off all lights in the room and close the door. Check for ambient light, even reflective clothing.
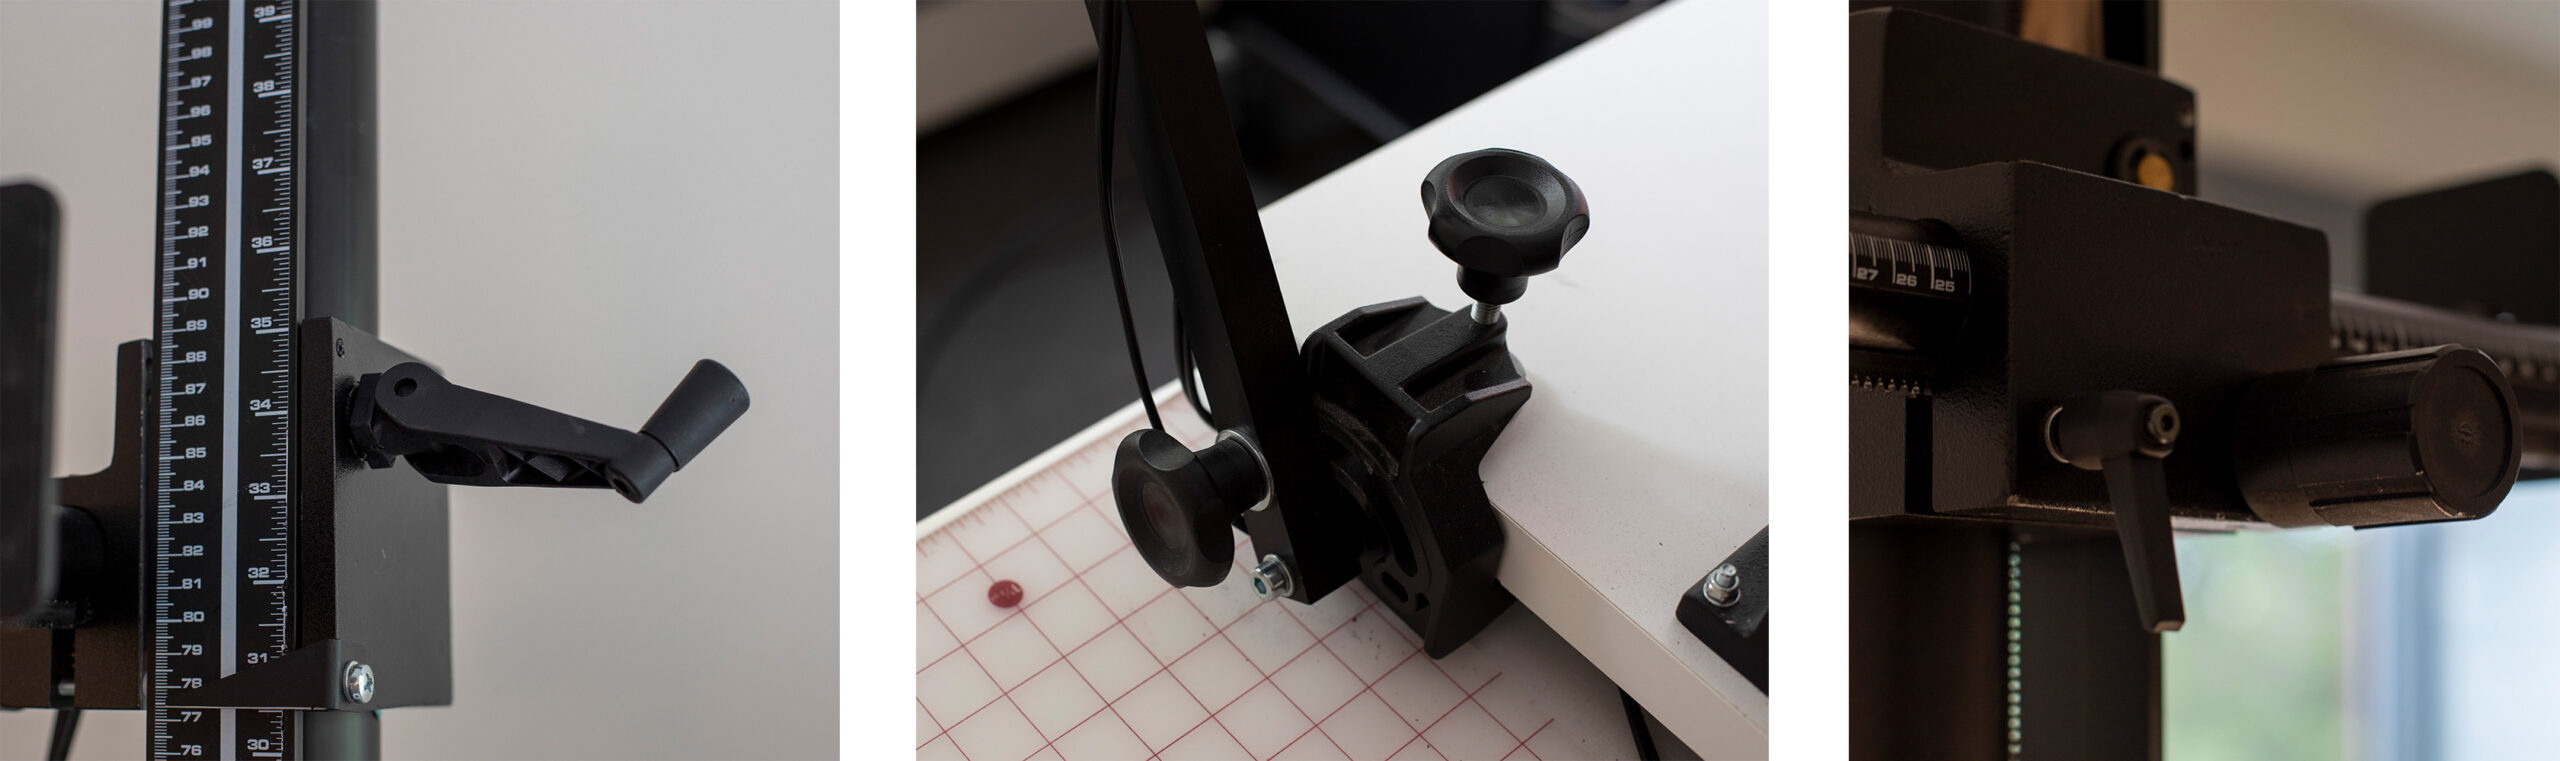
- Mount your camera or phone and use the crank handle to adjust the height.
- Switch on the power strip to turn on the lights. Unplug individual lights to turn them on and off.
- Place your object in the center of the black felt
DSLR Camera Setup
- Make sure the correct lens is attached to the camera for your project (50mm lens for medium to larger works, 100mm macro for small works).
- Use the gray card to set a custom white balance using your intended lighting.
- Set the camera to Manual.
- You can use a remote or tether the camera to the desktop computer to shoot remotely:
- Remote: Use Manual Focus, adjust camera settings on the camera.
- Tethered Capture: Use Auto Focus, use the Canon Utility to adjust settings.
Phone and Tablet Setup
- Use the gray tray or phone holder provided to hold the phone
- Use tape or putty to stabilize your phone on the tray.
Using the Copystand with a Tethered Camera
- Attach the camera to the computer using the USB cable.
- Make sure camera is set to Manual (M) and the lens is set to auto focus
Start EOS Utility 3
- Start the EOS Utility 3 software to operate the camera. When the EOS software opens, click Remote Shooting and the operating panel will open.
- Use the center panel to adjust the f-stop, shutter speed, and ISO settings. Suggested Settings: set the f-stop to 7.1, set the shutter speed to 1/50th of a second, and set the ISO to 200. Use your custom white balance or set the color temperature to 5600K.
- Click the folder icon at the top right to select the location where you’d like the photographs to be saved.
- Click the image size button to decide the image’s file type.
- For advanced detail settings, click the Picture Style menu to choose a photo profile.
- Once the camera settings are ready, click Live View Shoot at the bottom of the panel.
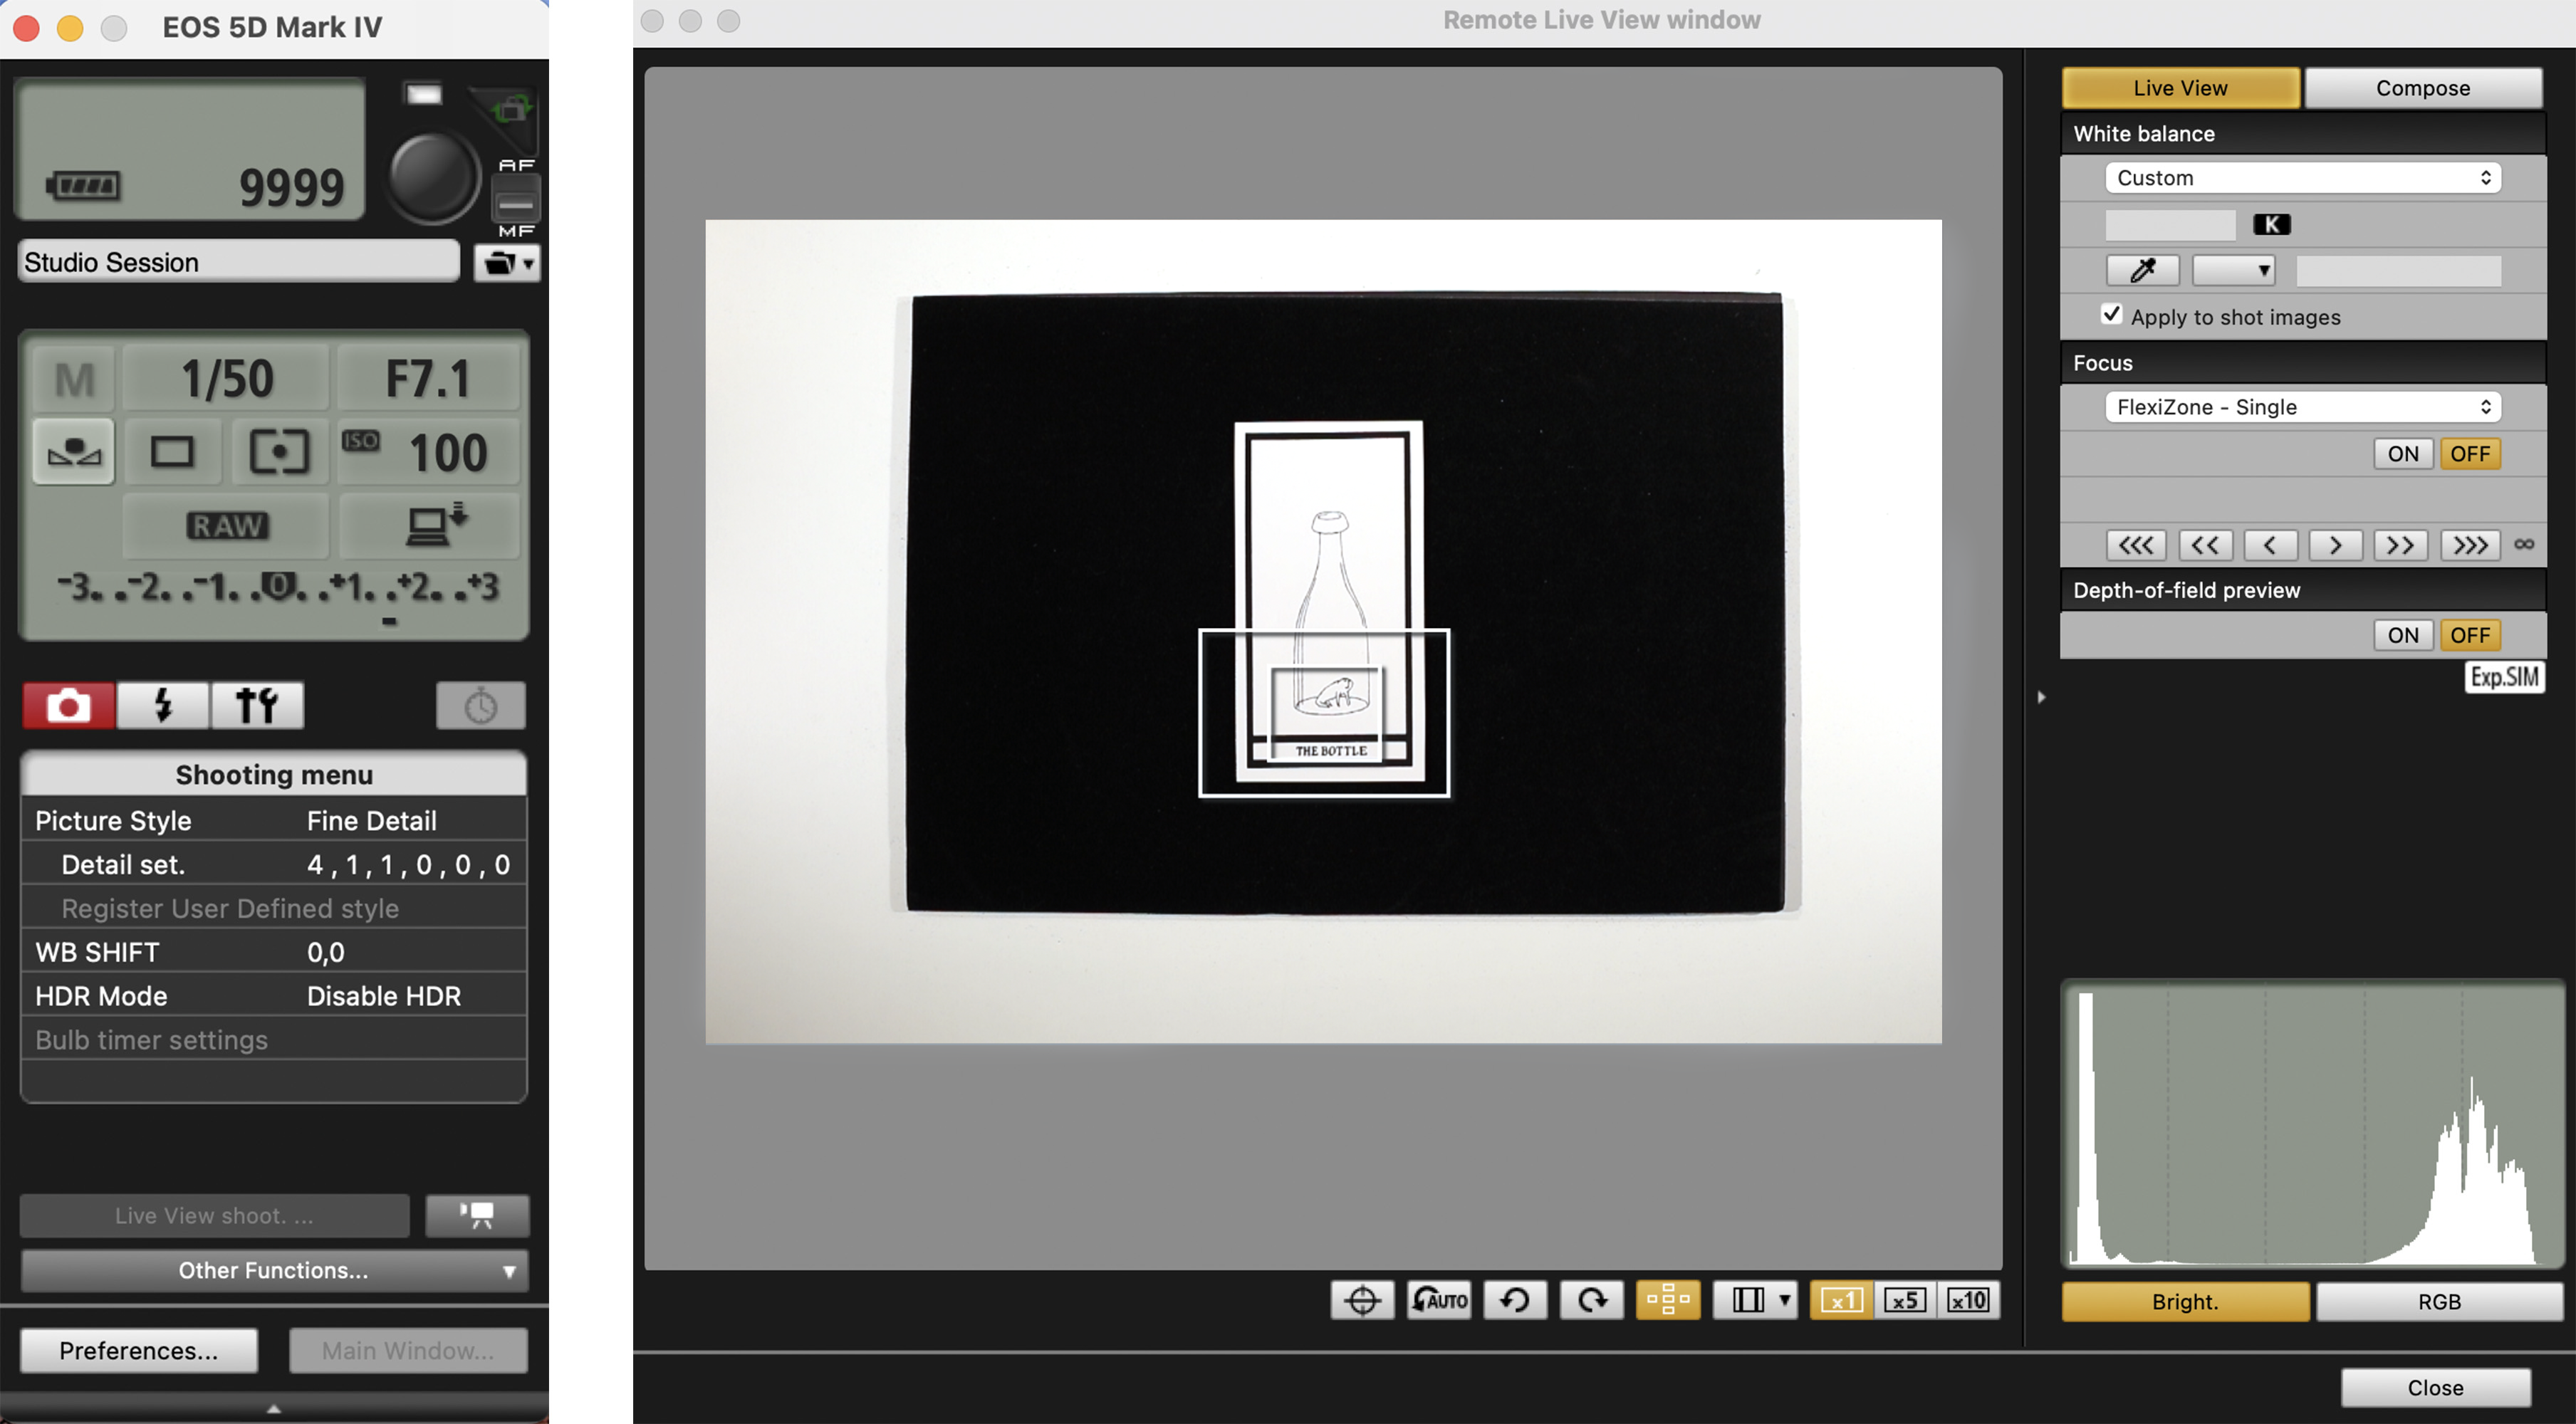
Set Up the Shot
The Live View window allows you to set up your shots without looking through the viewfinder. The lighting shown on screen will not exactly match what the camera will shoot, so it’s best to shoot a test shot and check it outside of the utility to confirm your camera settings. Note: The Live View will only allow you to adjust the focus on the camera. The White Balance settings at the top right will adjust the live display, not the camera’s exposure.
- Using the Live View window as a viewfinder, position your artwork under the camera.
- Adjust the angle and distance of the camera so the lens is completely perpendicular to the item and the item fills the screen of Live View.
- Move the white box in the middle of the Live View window to the area of the shot where you want the camera to focus.
- You can adjust the focus using the arrow buttons in the middle right of the Live View window.
- Once the camera is adjusted, place the gray card over the artwork and look at the light meter readout in the EOS operating panel. It should read zero. If it does not, adjust the f-stop.
To Shoot
Click the black button at the top right of the utility panel to take your photos. Hover over it to engage the auto-focus.
To Change the Batteries
If you need to remove the camera to switch out your battery, hold the camera firmly with one hand and use the other hand to reach to the back of the camera plate and twist to unscrew. Your battery will last for about two hours of shooting.
To Change the Lens
To remove the lens on the camera, first make sure the lens cap is on. With one hand, hold the lens firmly, and with the other, hold down the large black button to the right of the lens on the camera itself. Twist the lens counterclockwise until it unlocks.