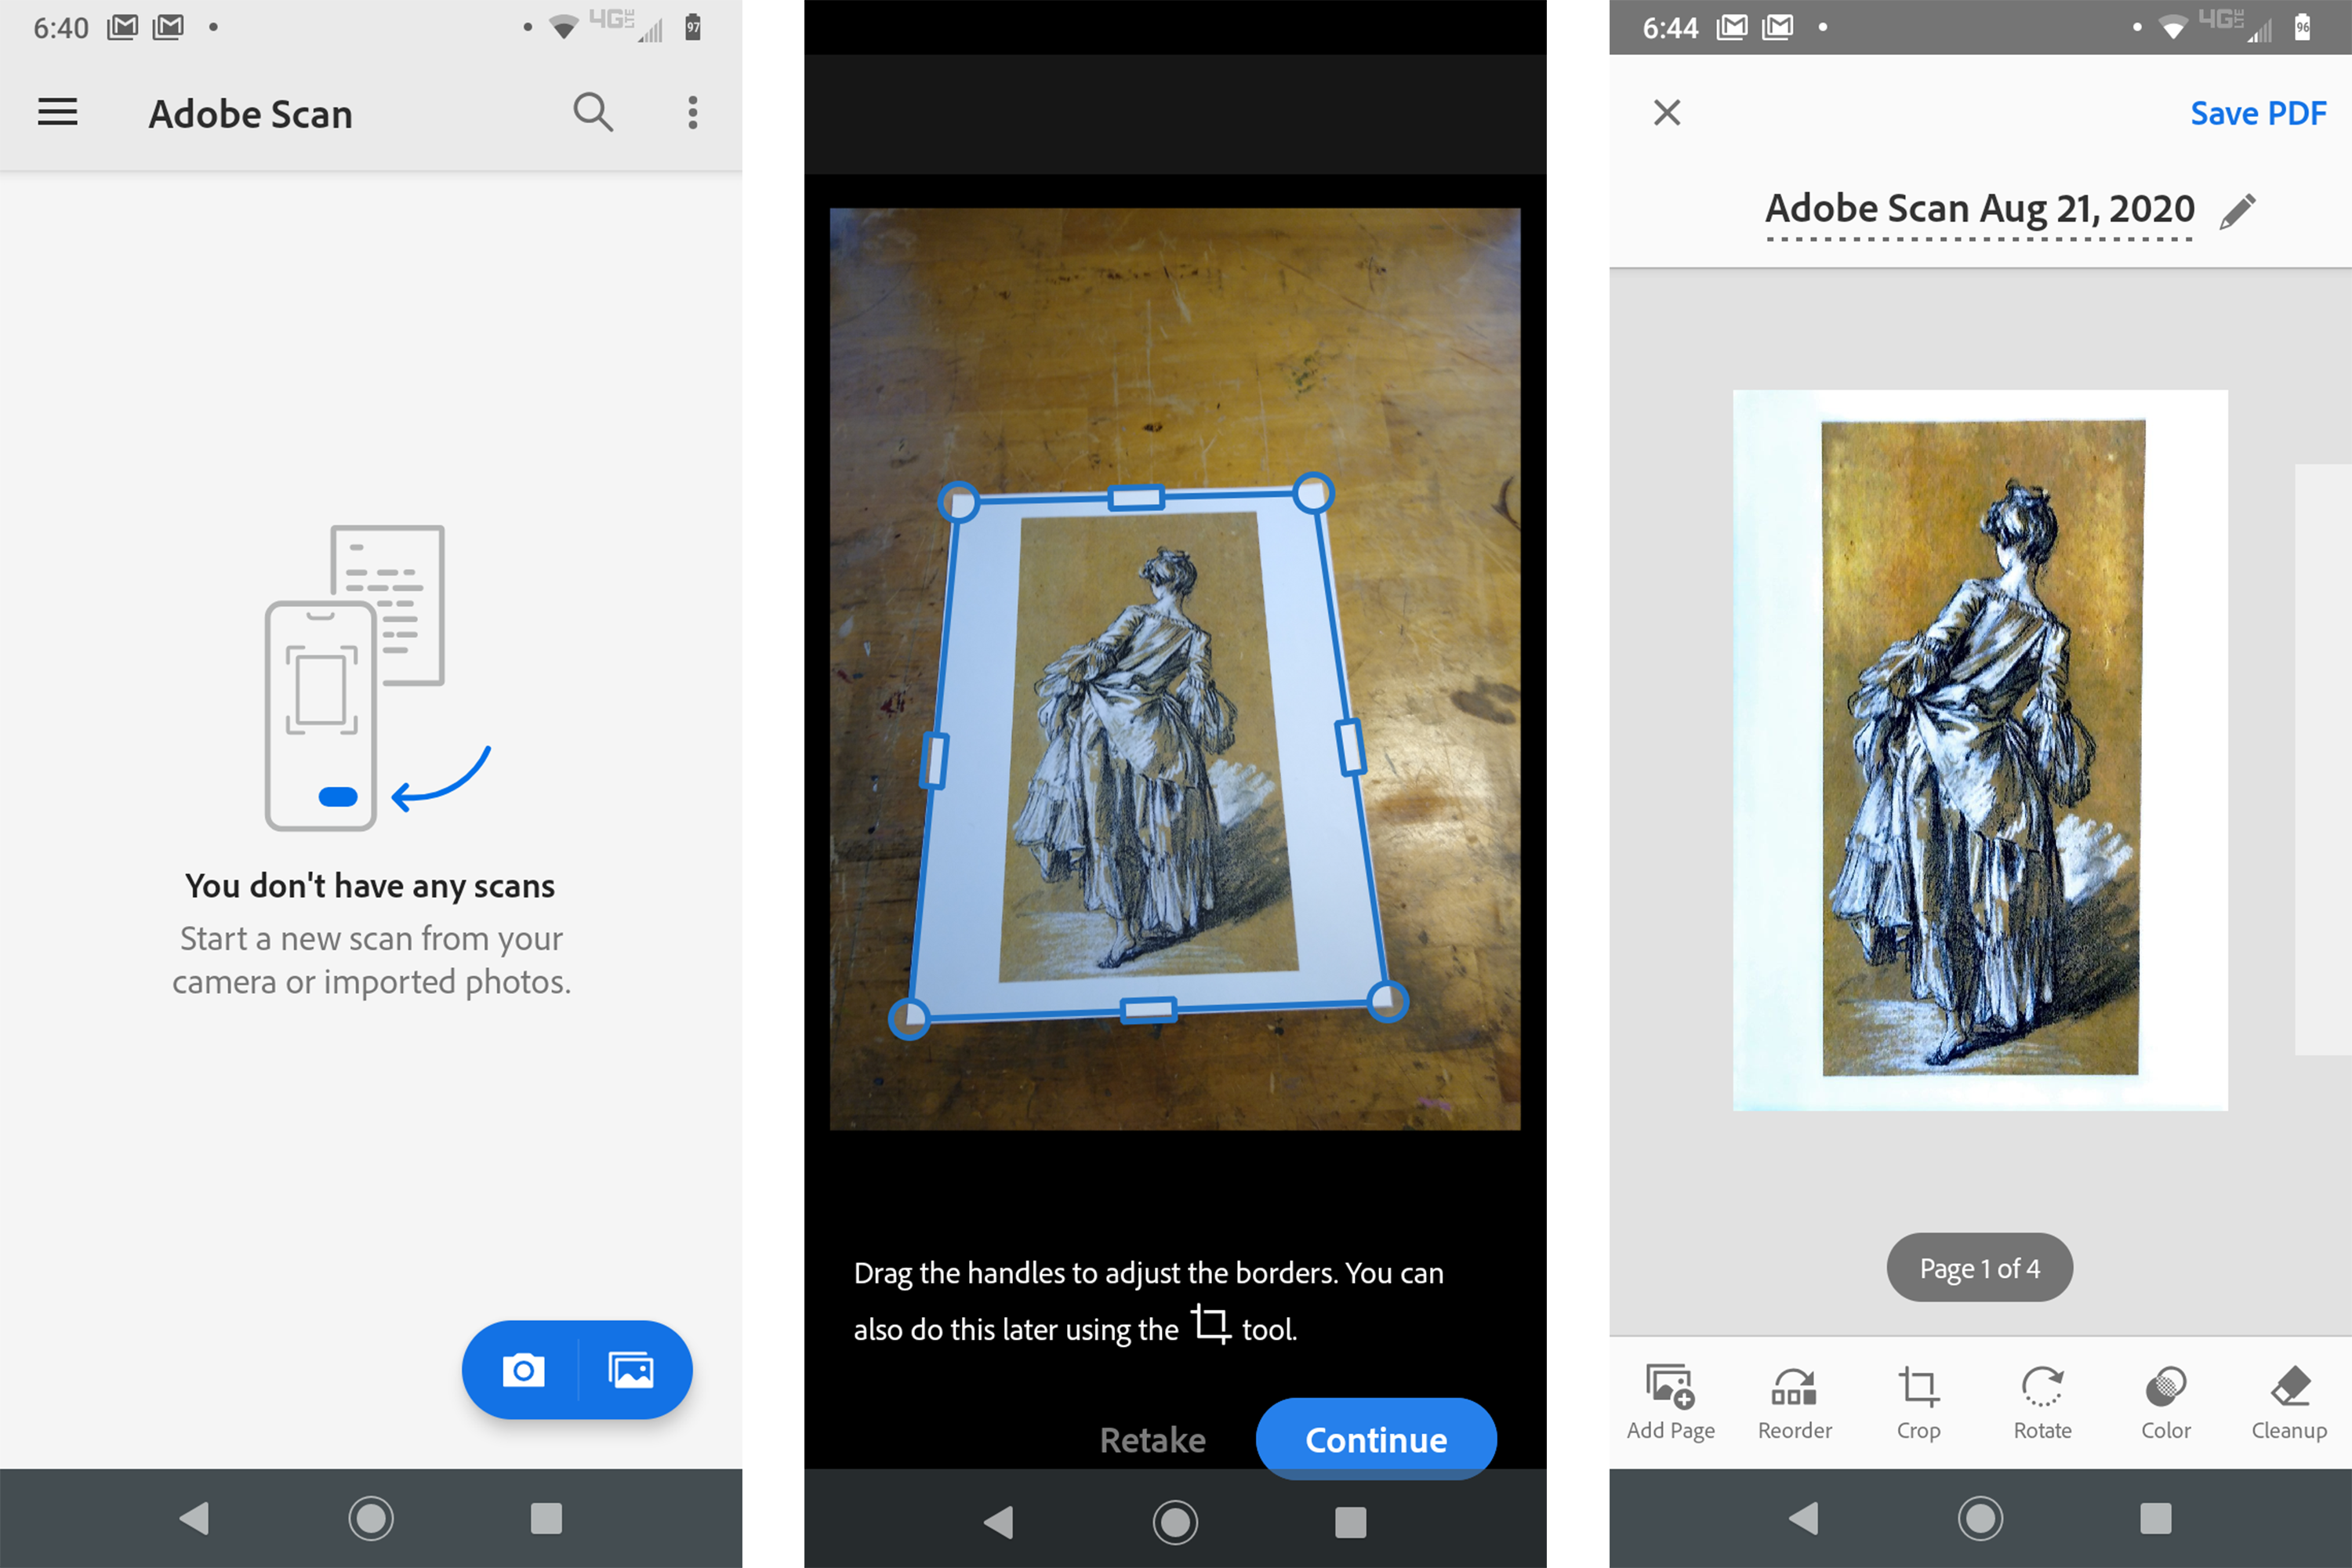
Using Adobe Scan to Scan Works from Your Smartphone
This section covers using Adobe Scan Adobe Scan is a free app for your smartphone that allows for quick scanning of documents and images.
- Once you open the app, click the camera icon at the bottom right.
- Your document will be automatically scanned. If the edges detected are incorrect, use your finger to realign the borders.
- Click the thumbnail of your document in the bottom right corner.
- Your document will be instantly straightened. Scroll through the tools at the bottom to make further edits.
- From the scanning window, you can select some common formats to enhance your scan. At the bottom are icons to disable the auto-edge finding feature and turn the flash off and on.
- Scans can be saved as a PDF. In conjunction with the Adobe Acrobat app (also free) you can scan & OCR documents all from the convenience of your phone.
- Back in the main menu, you can select a saved document. Click the to change it to a JGP, upload it to Google Drive, continue editing, or delete it.

Shooting Artwork with a Camera
This section covers camera settings you can use when photographing your artwork.
Tripod and Camera Height
Adjust the height of the camera on the tripod to the middle point of the painting or sculpture (stand next to the subject to determine the height). The camera should also be level to the ground.
Lenses
For the digital cameras available in the Imaging Center, a 35mm lens gives a “normal” view and works well for a large painting or sculpture. If photographing small works or tabletop items, use a 50 or 100mm macro lens, so your camera doesn’t have to be close to the artwork. A zoom lens will give you the flexibility to photograph both large and small subjects. All our digital cameras come equipped with a zoom lens. Make sure your lens is clean!
Camera Settings
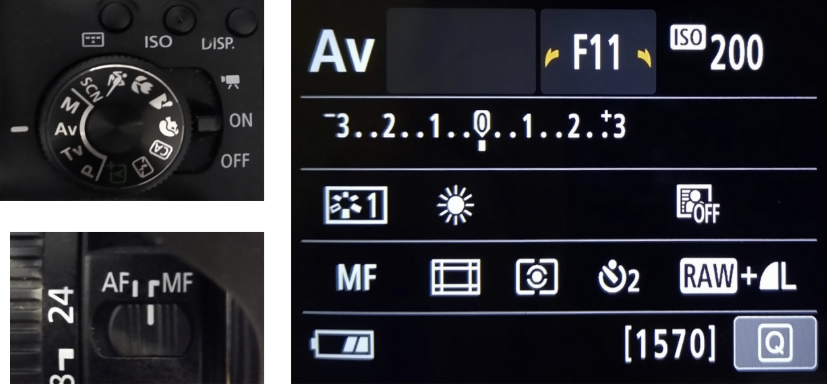
- Set the lens to manual focus. The switch can be found on the side of the lens. The “stabilizer” switch, if there is one, can be left on or off. It’s helpful if you’re hand-holding the camera, but is isn’t necessary with a tripod.
- Clear all camera settings to erase settings from the last user.
- Disable the flash, if the camera has flash.
- Shoot in Aperture Priority (AV) Setting. This means you will set the Aperture (referred to as F-stop – the size of the hole that lets in light). The shutter speed will be automatically determined by the camera, based on light conditions.
- Set Aperture (F-stop) to F11. A number lower than F8 will create a slightly blurred background (a shallow depth of field) that may blur the more distant parts of 3D objects being photographed. This effect becomes more dramatic the closer you are to your subject.
- Set file type to Large/RAW. This will create a large JPEG for you to edit in Photoshop. The RAW file will allow for advanced processing (lens distortion, batch editing) in Adobe RAW.
- Set the ISO (film sensitivity to light): 100 or 200 is preferable. A setting above 400 will introduce noise to the image.
- Set the White Balance
- If using natural light set the White Balance to daylight. This will maintain a consistent color for all your images. You can try a different setting if daylight does not produce accurate colors.
- If using studio lights set the White Balance to Tungsten.
- Alternatively, use a grey card to set a Custom White Balance.
- Turn Auto Rotate off.
- Set the timer to a few-second delay so the shot will be taken a moment after you press the button, to reduce camera shake.
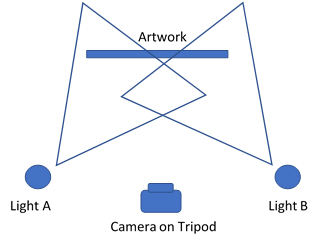
Setting Up Studio Lights
Position the light stands at 45-degree angles to either side of the artwork. The height should be the same as the camera height (middle of the object being photographed). Umbrellas in front of the lights will help to soften the light and reduce hard shadows.
Switch on one light first, then switch on the other light so you get a clearer sense of how each light source affects the light falling on the subject. Look carefully through the lens to make sure that the lights are not reflecting on the surface of your artwork. If you see reflection, the lights could be moved to a more oblique angle (closer to the wall). Also, check that the light looks even across the area that you are photographing and adjust the lights as necessary.
Make sure that the studio lights do not shine directly across the front of the camera lens as this will deteriorate image quality. If this is the case, move the camera back, move the lights, use a lens hood (ask for one at the Imaging Center), or place something between the lights and the camera to cast a shadow on the lens.