Fundamentals
Lighting
A good documentation photo is all about lighting. You don’t need a fancy camera.
Diffuse daylight is an excellent light source that doesn’t require any setup. When using natural light, try to document your work on a cloudy day. This will lessen or eliminate the harsh shadows that can be caused by direct sunlight. Set up by a window, or work outside.
If you do need indoor light, pass the light through a piece of white trash bag or a white t-shirt – anything that will soften it. Position two lamps at 45-degree angles on either side of the artwork. The lamp height should be the same as the camera.
A sheet of white cardboard (or even regular printer paper) can be used as a reflector to fill in and even out light on your object, as shown below:
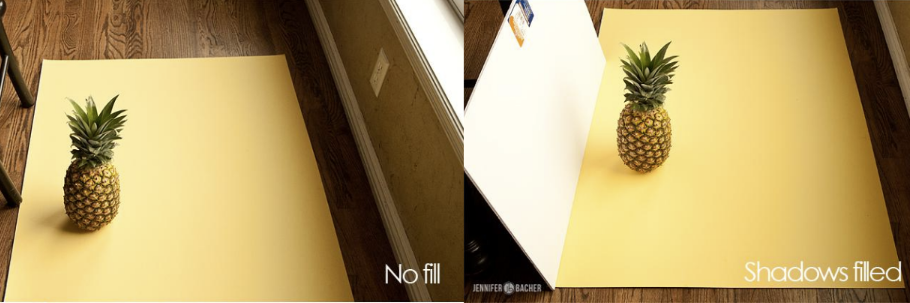
from http://weedit.photos/2017/white-foam-core-photography/
Camera Placement
Fill as much of the frame as possible with the artwork, without zooming or cropping. You can always crop later, if necessary.
For 2D art, try to get your phone or camera as parallel to the artwork as possible and at the height of the middle point of the work. Your phone or camera should be level to the ground as well.
Position yourself in such a way that your own shadow isn’t in the picture. See the videos in the “Useful Links” section below for suggestions on how to position the work.
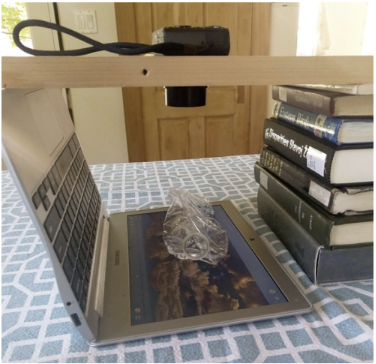
If you’re using your phone and don’t have a tripod, use the self-timer feature in your camera app to give you a few seconds to steady your shot after you press the shutter button, to avoid blur. You can improvise a way to prop up and steady your camera using objects you have handy.
Color Correction
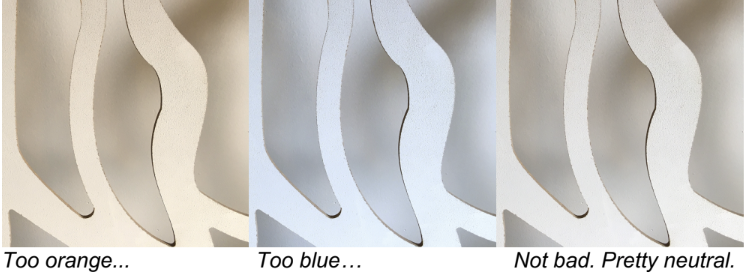
All images should have a similar, neutral white balance. The best way to achieve this is to take
all the photos of your works at the same time, in the same lighting conditions. If it turns out the white balance is off, the color
correction needed for each photo will be the same. If you’re using a phone, see if there’s a way to turn off the phone camera’s automatic white balance function so that it doesn’t change the white balance with every shot.
File Size
Your initial scan or photograph should be taken at a large size and resized down to fit the need.
Never capture an image small and try to make it bigger. The result will be badly pixelated.
For cameras, choose the “Large” image size.
If you’re using a scanner, scan at least at 300 dpi, if not 600. When saving a scanned image, save it as a TIFF. This file format saves your image at the highest quality and is a standard for archiving.
Useful Links
- How to Photograph Your Art by Sketchbook Skool: Simple tips for getting good-quality photos of flat artwork using your phone.
- Photographing your 3D Art with an iPhone by afterART: Documenting 3D work using an iPhone, with a demo of the Snapseed app to clean up the photo (it’s an old version of the app so the interface differs, but the principles are relevant).
- How to Build Softbox Lights by Major Hardware: An example of a DIY softbox.
- How to Photograph Your Art for Beginners by Art Prof: Create and Critique: A tutorial on how to photograph both 2D and 3D artwork.