JSTOR holds over two million images of art objects, historical material, and scientific artifacts from collections including the Magnum Photojournalism Archives, the American Museum of Natural History, the Smithsonian, the Metropolitan Museum of Art, Conde Nast and more! (If you are looking for Artstor, the database has been moved to JSTOR. You can find it at Artstor on JSTOR).
How to Log in with Smith College
1. Visit any page on JSTOR. If the page says Access Provided by the Smith College Libraries at the top, you are already logged in.
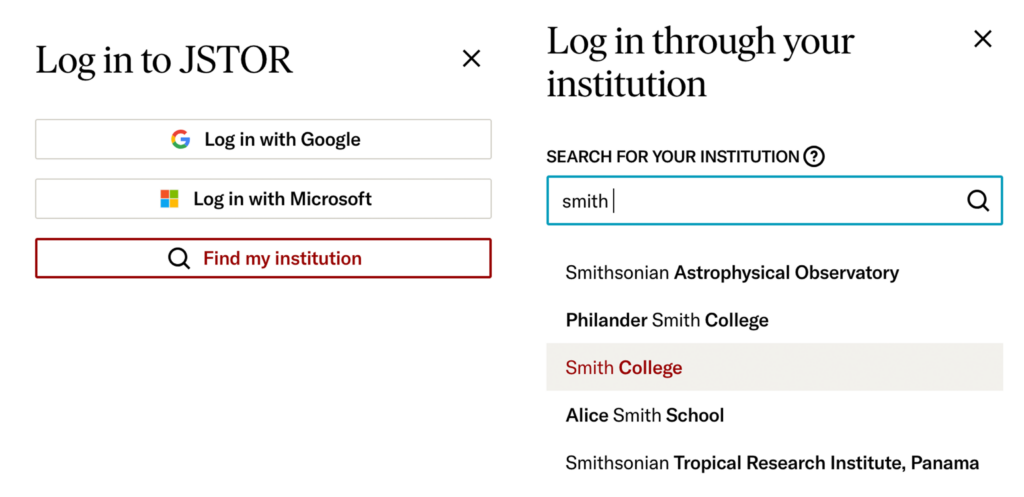
2. If not, click the Log in through your library link at the top of the page or the red Log in button in the upper right corner.
3. Click the Find my institution button, type Smith College in the following search bar, and select it from the drop-down menu.
4. You will then be prompted to log in using your Smith College account.
5. Once you are logged in, you will be able to browse all of Smith College’s institutional collections.
How to Create an Individual Account
With an individual JSTOR account, you are able to save, organize, share, and export materials you find on JSTOR using the Workspace feature.
1. Make sure you’re logged in with Smith College. This will pair your personal account to the institution’s account when you register.
2. Click the Register button in the upper right corner of the page.
3. Enter your Smith College email address. JSTOR will send you a link to your email to confirm it.
4. Go to your email account to find the confirmation link. Once you click on it, you will be directed to create a password, select your institutional role, and accept JSTOR’s terms and conditions before finalizing your new account.
5. You now have an individual account to use when browsing JSTOR materials!
How to Access the Imaging Center Collection
1. Once logged in, go to Browse, then select Your Institutions Collections. 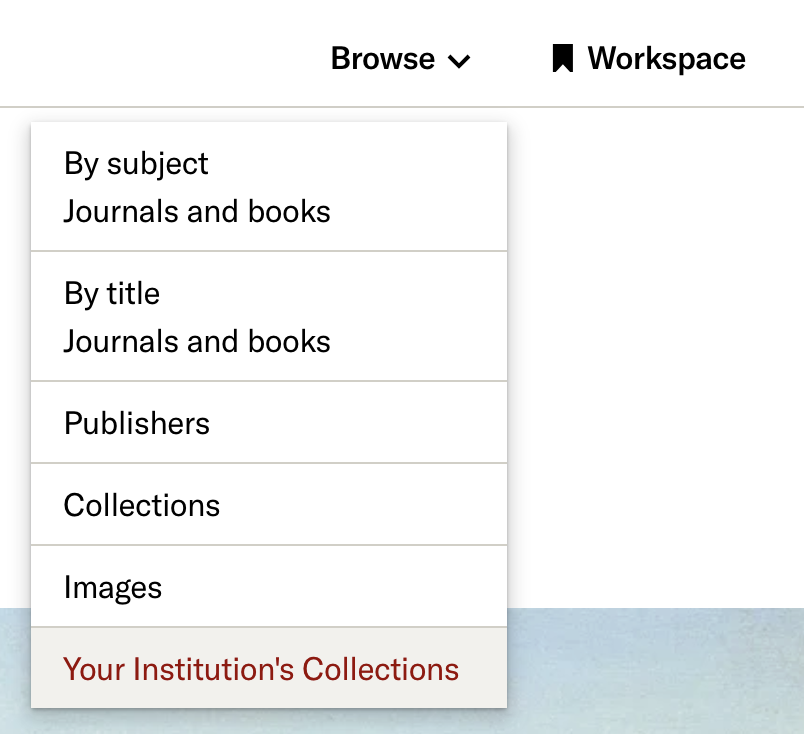
2. Scroll down to find Smith College Imaging Center Collection and select it.
3. To search for specific artwork, use the Search Within Collection box.
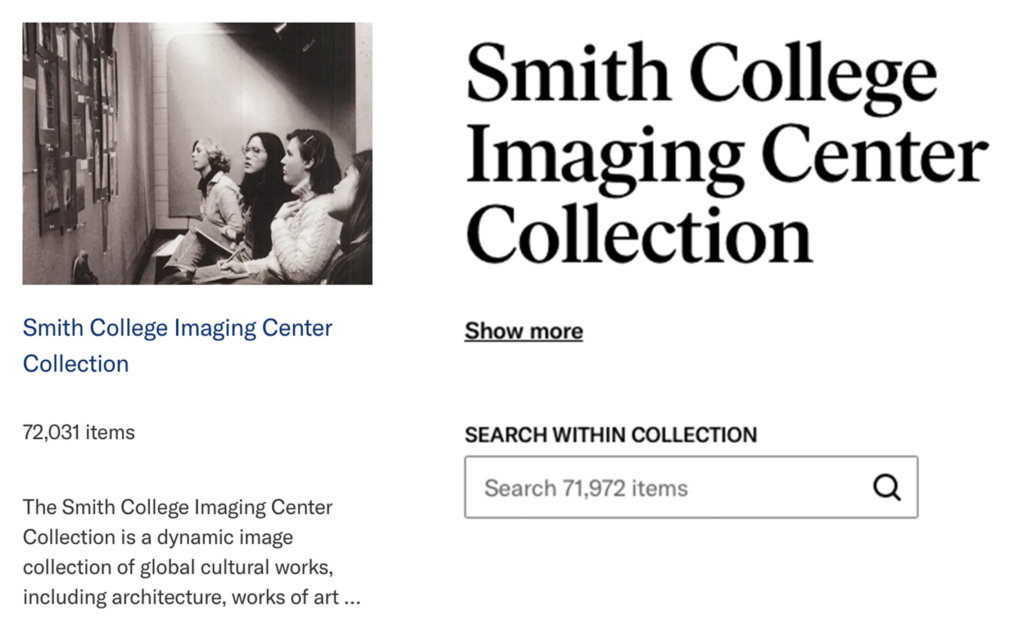
Image Searching on JSTOR
Image searches can be entered into the All Content search bar or into the Images search bar.
Searching keywords or phrases in the all content search bar will return both text and image results. These can be filtered using the settings to the left side of the page. Searches in the images search bar will only return image results.

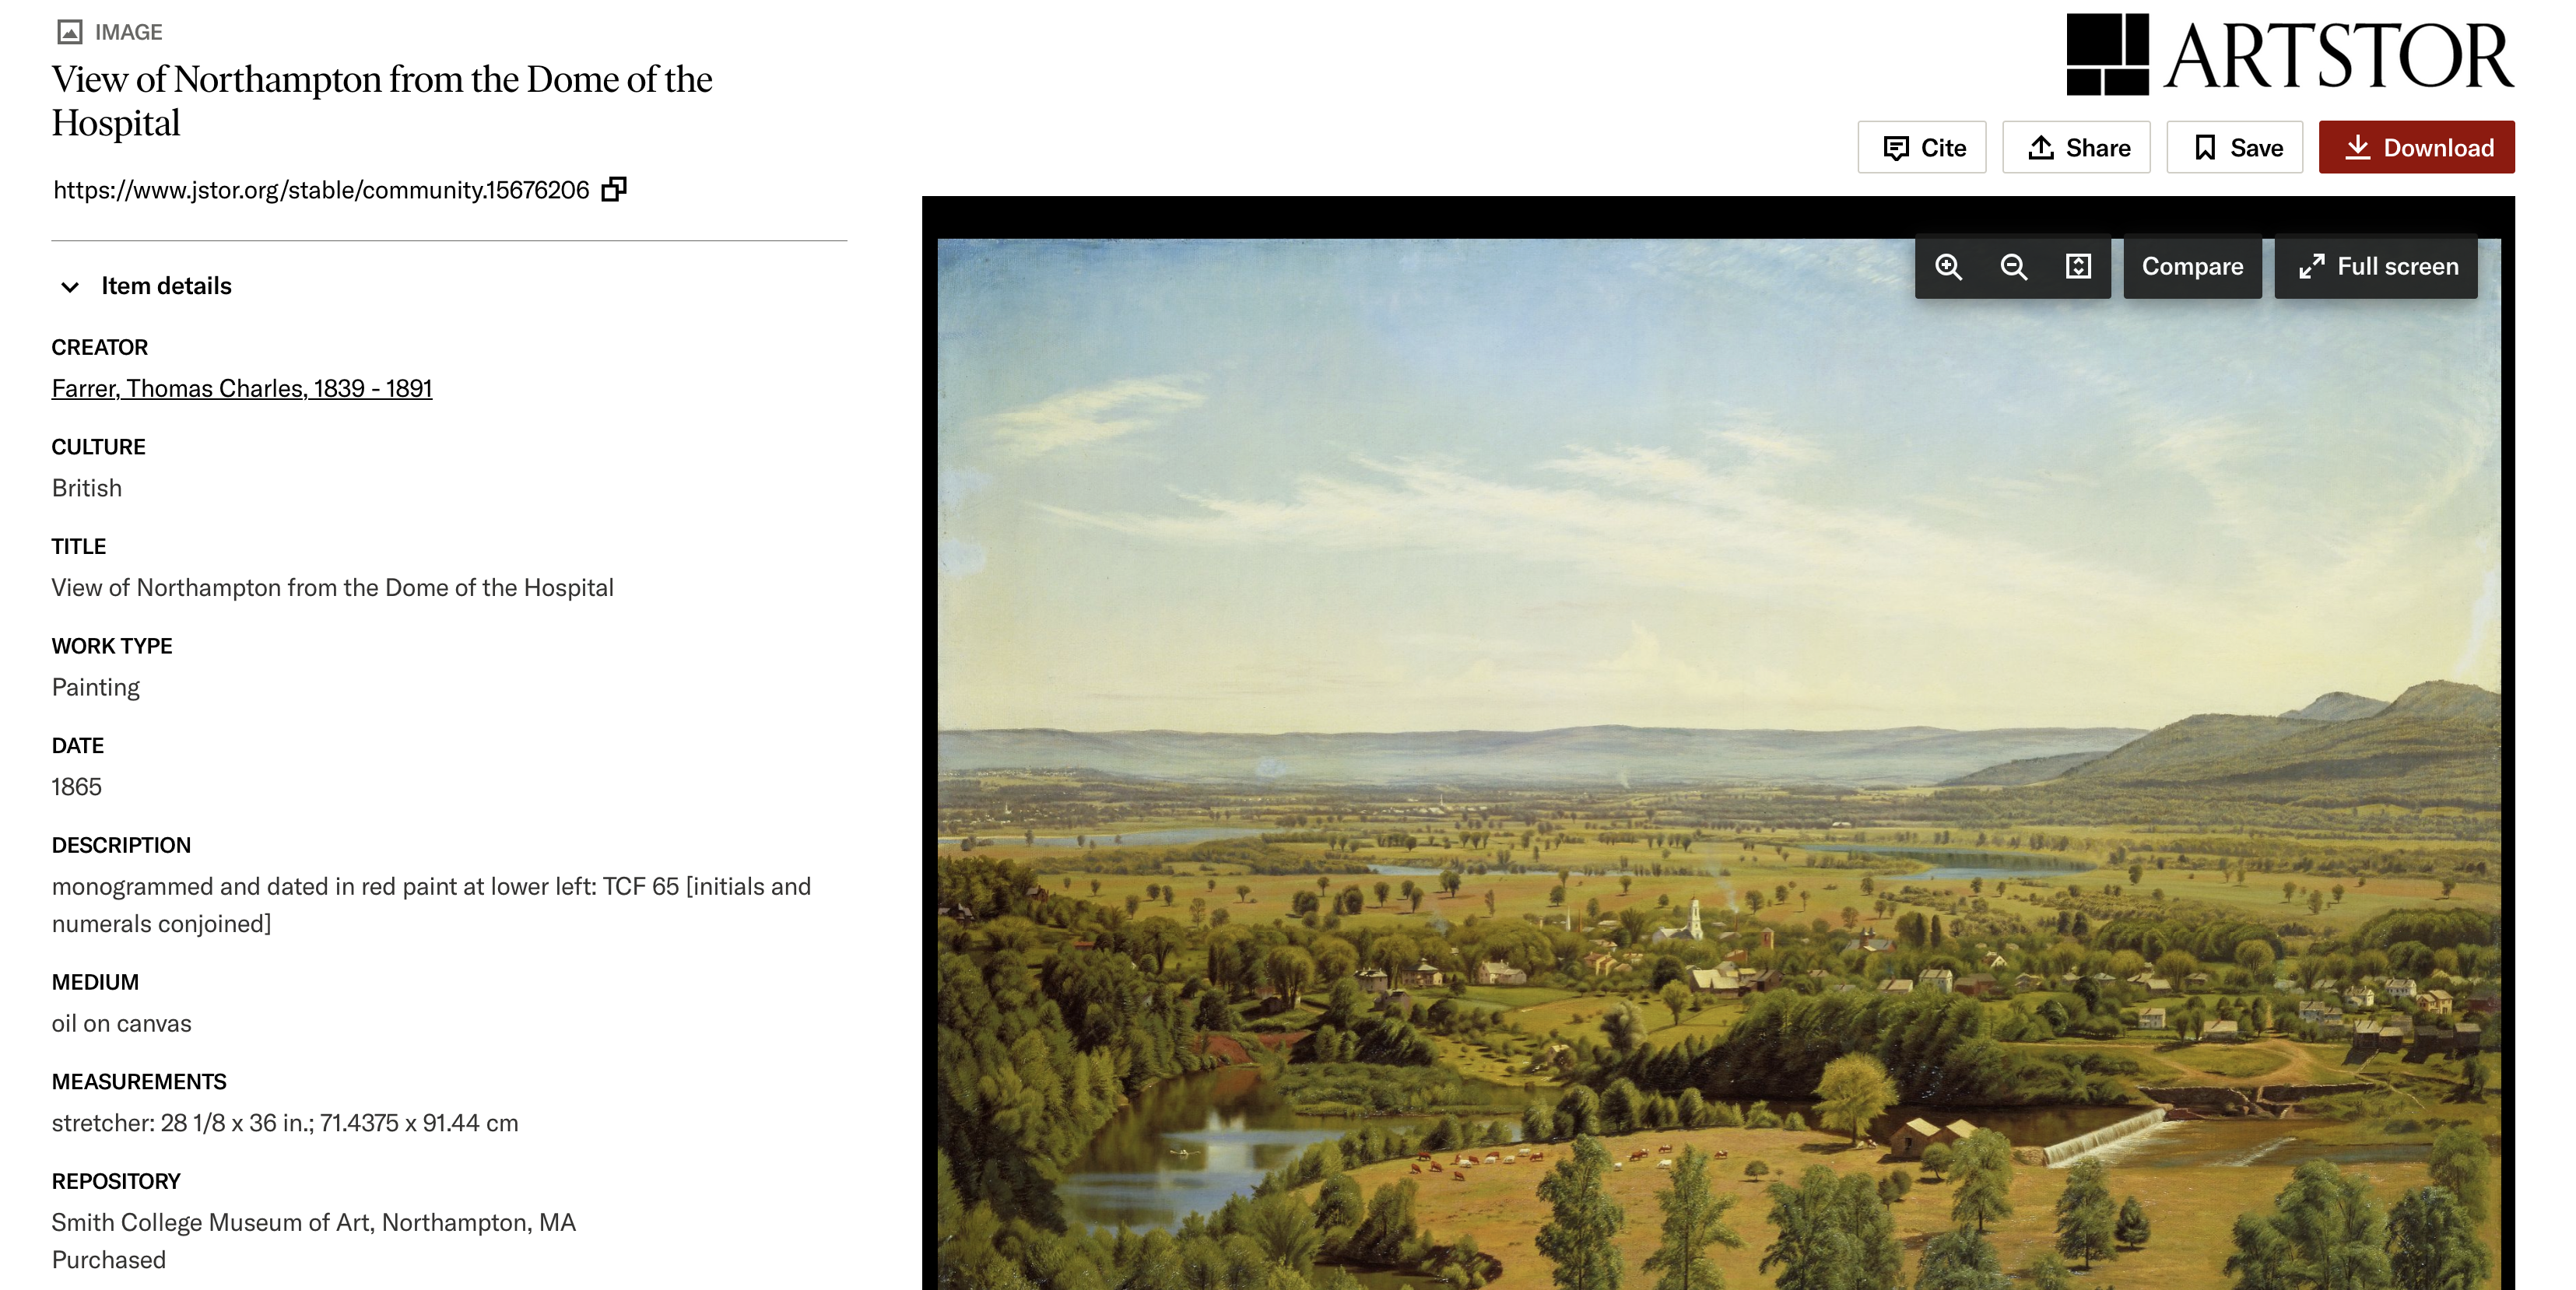
To view the full item, select a specific image.
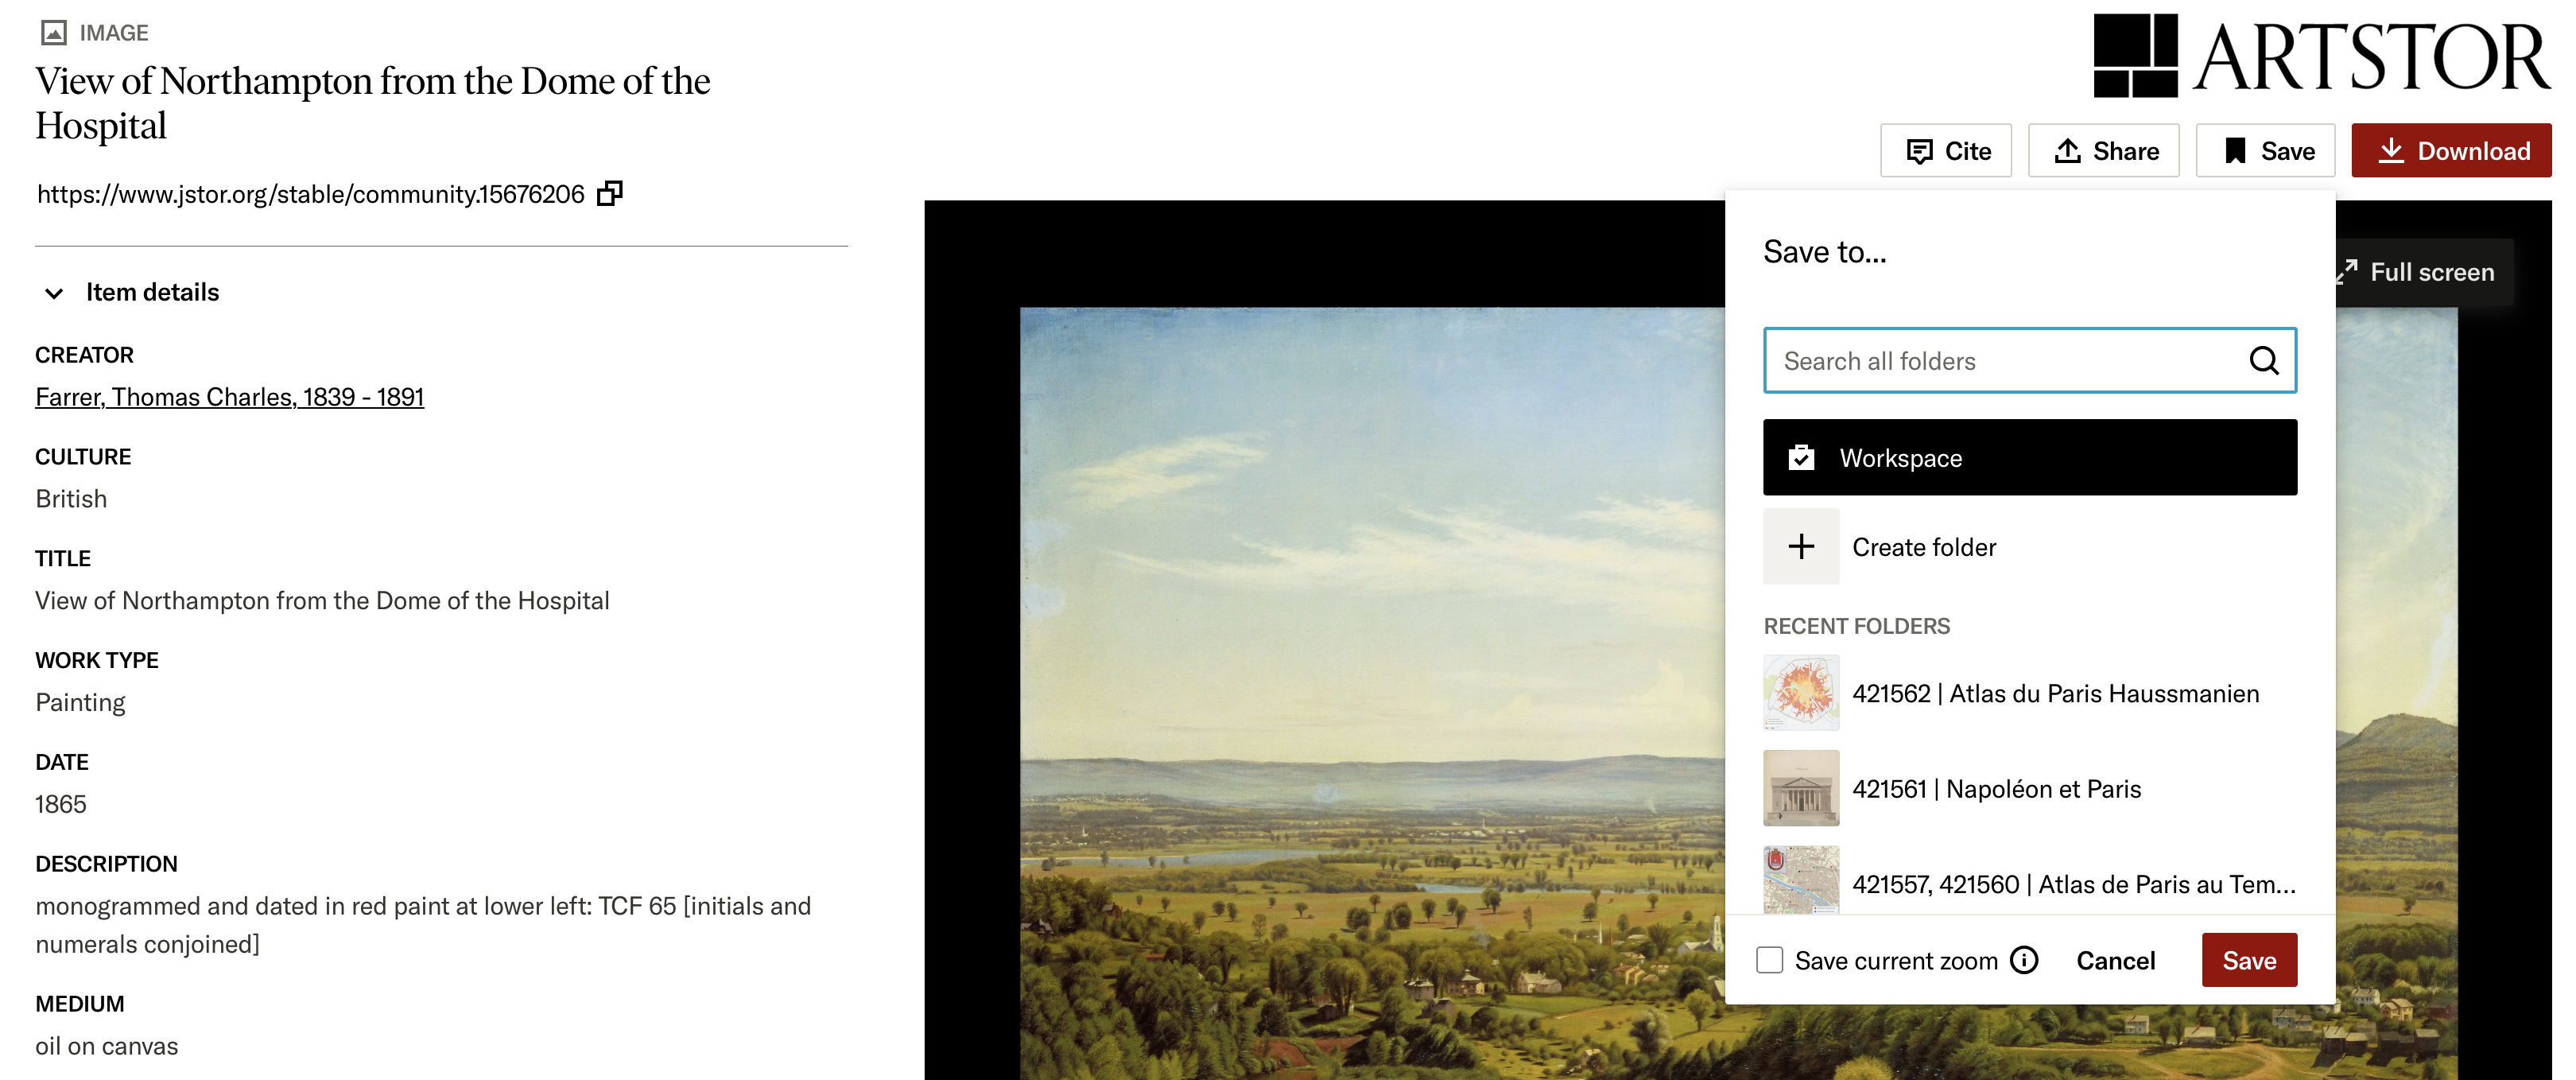
The image page contains the image in an embedded image viewer for a variety of viewing experiences. You can use it to zoom in an out on the image or compare it with another image. The page also contains information about the image such as the creator, date, medium, measurements, and copyright.
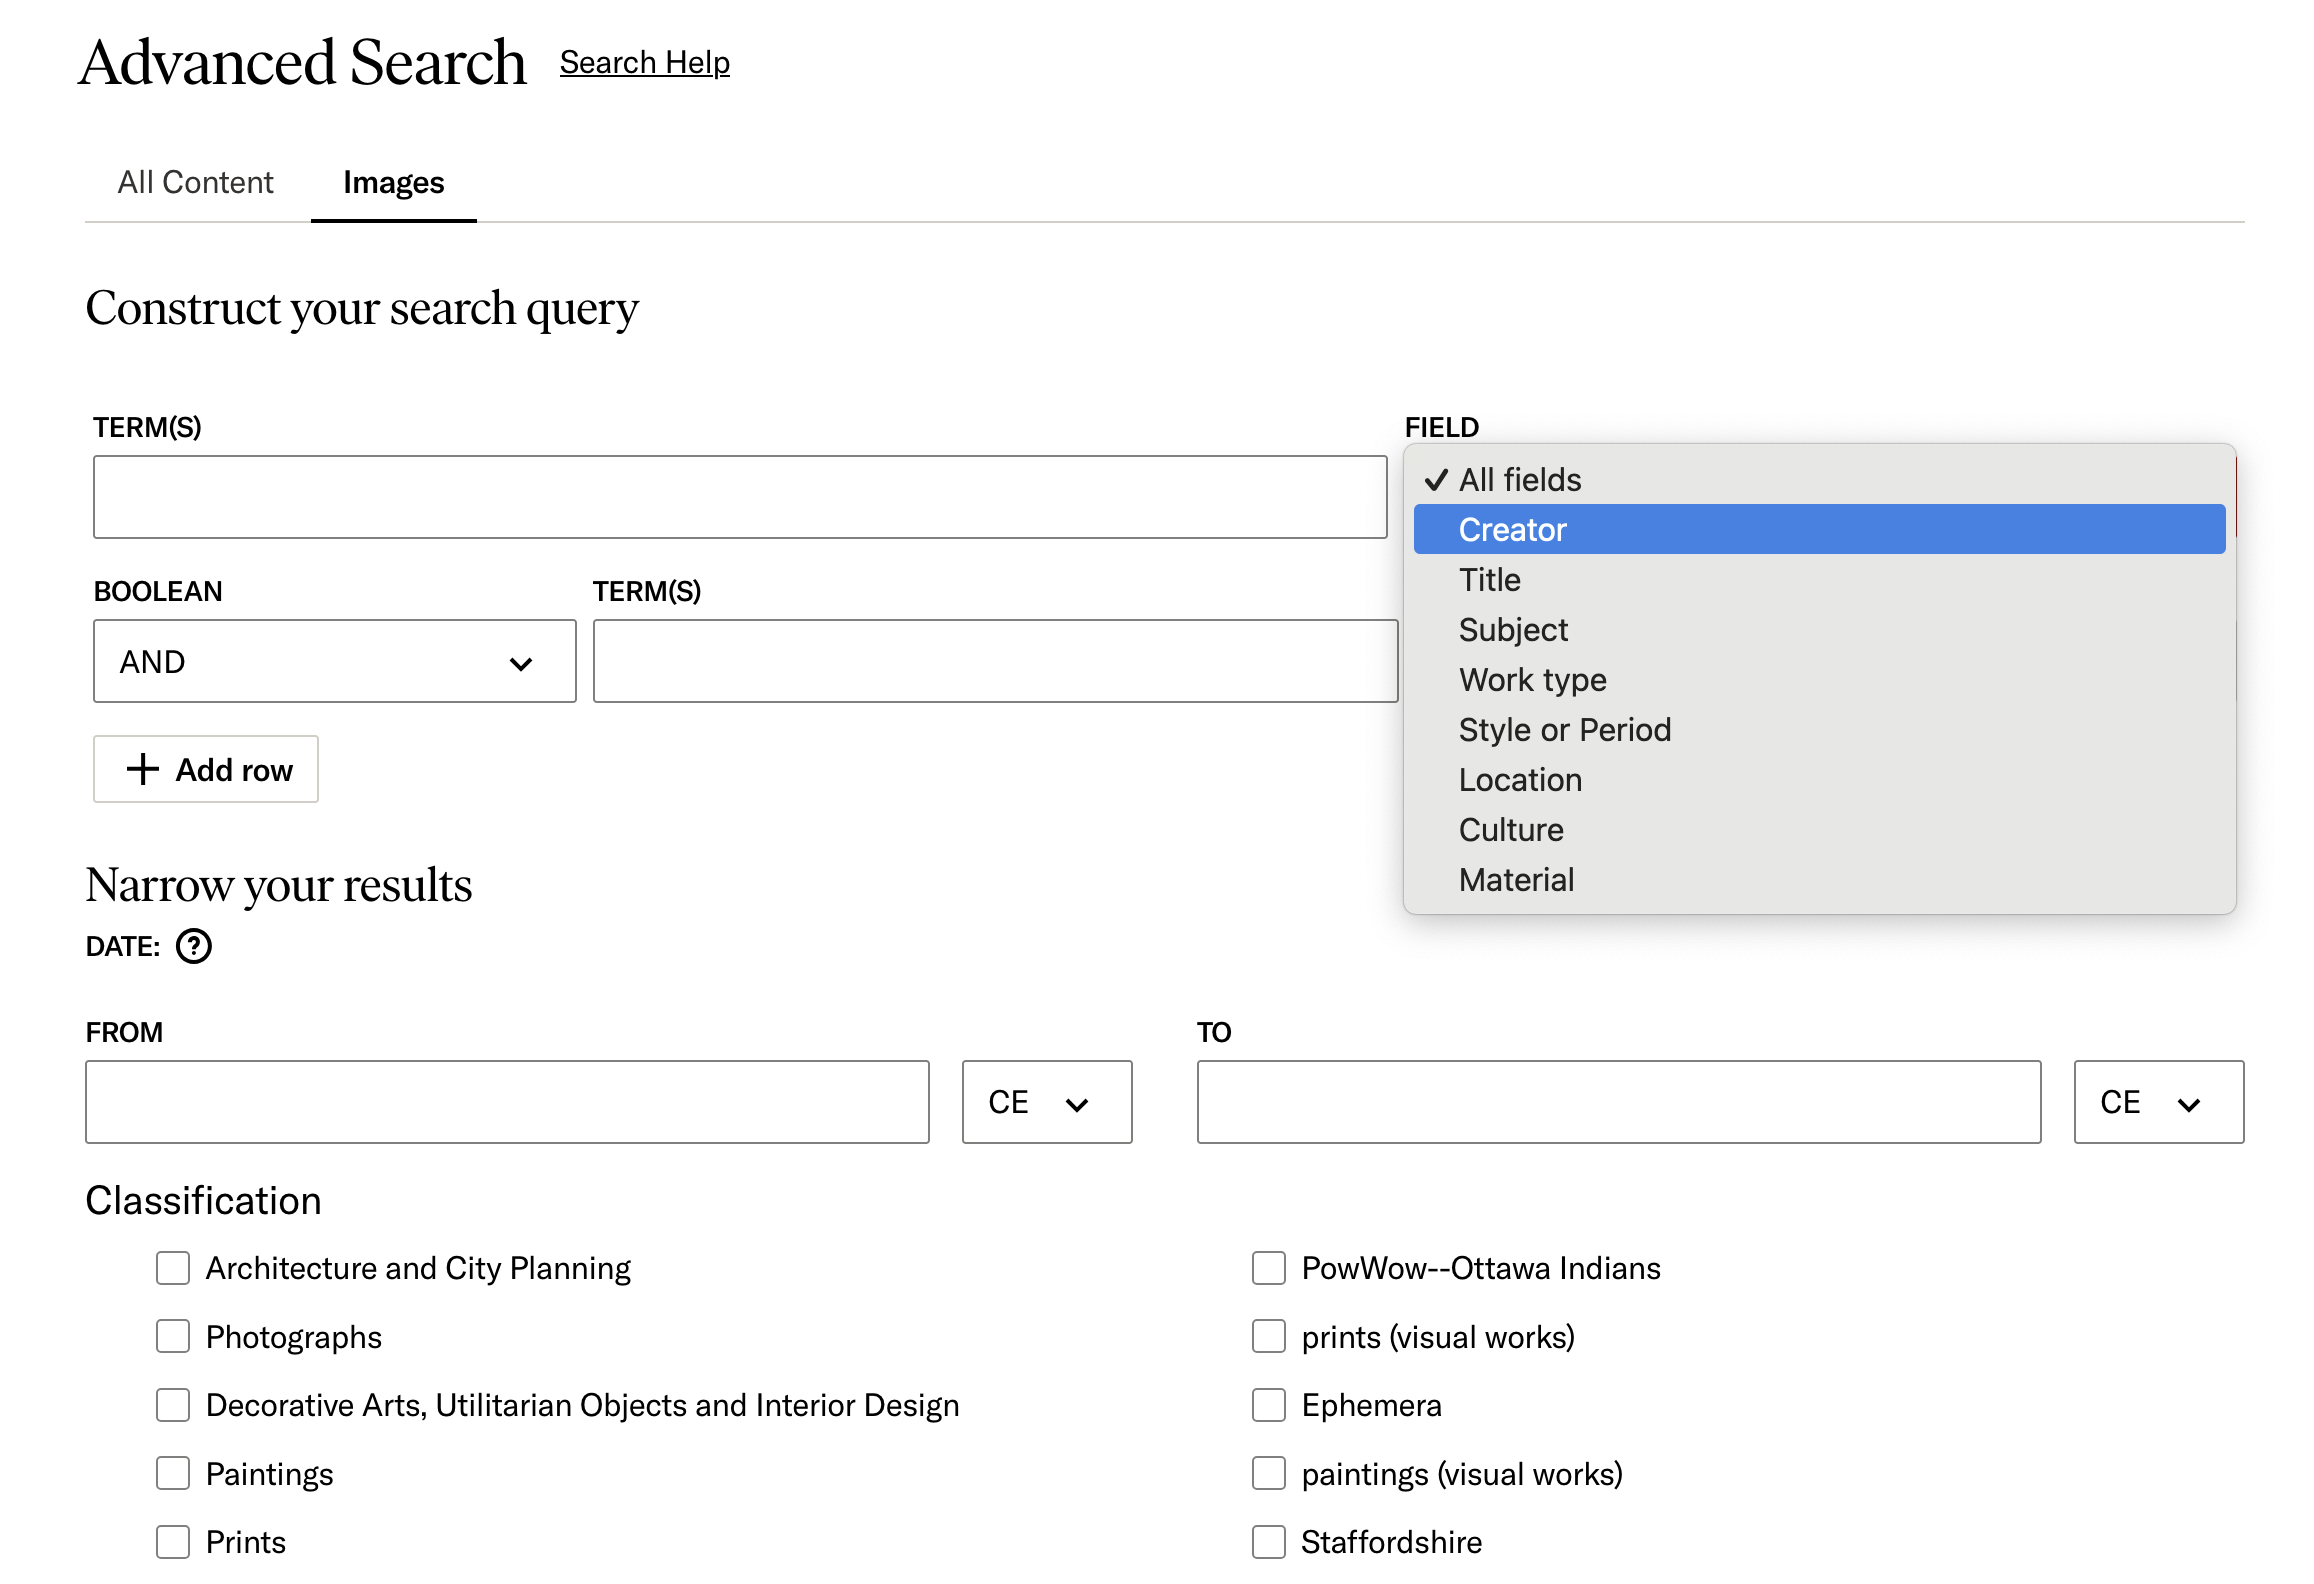
Advanced Searching
For more specific image searching, you can use the Advanced Search feature to narrow your search results. It is located to the upper right of the search bar.
Use the drop-down field menus to search within a specific field, such as:
- creator
- title
- subject
- work type
- style or period
- location
- culture
- material
Use one or more of these fields to refine your search by combining fields with the Boolean terms: AND, OR, and NOT. For instance, “Vincent van Gogh AND Self-Portrait,” will return all self-portraits by Van Gogh, whereas “Vincent van Gogh OR Pablo Picasso” will return all images related to one artist or the other. If you’re specifically looking for pencil sketches by Vincent van Gogh, you can search “Vincent van Gogh NOT painting.”
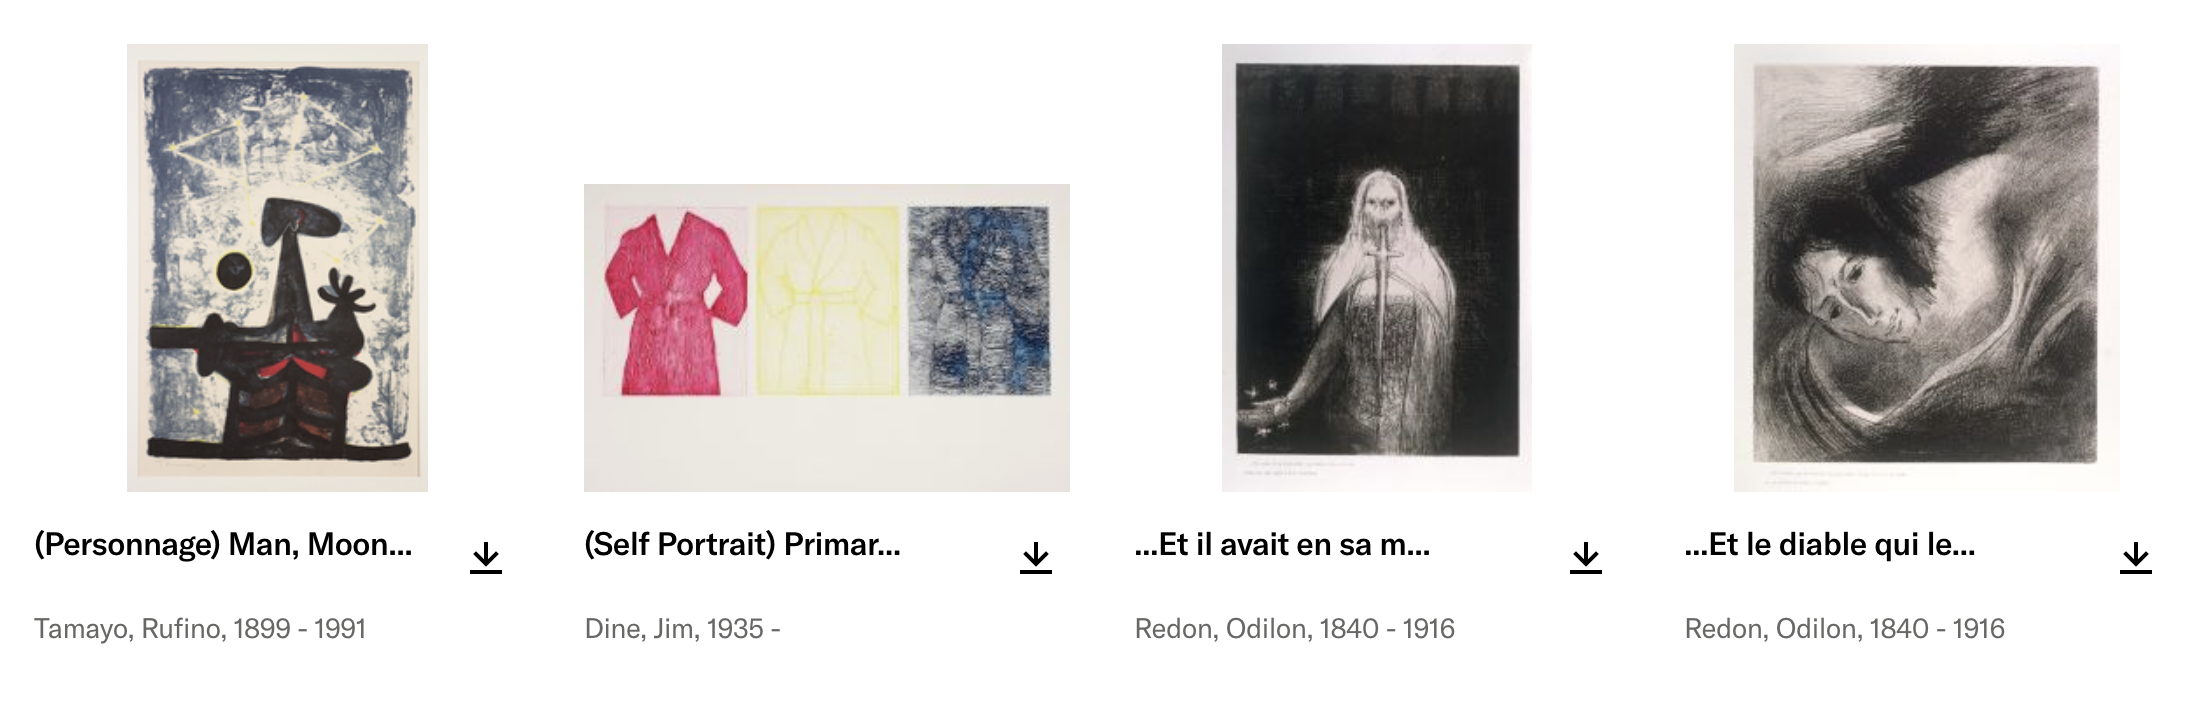
Classification filters are also available for select images from curated groups such as Paintings, Humanities and Social Sciences, Maps, Charts, and Graphs and more.
Downloading Images
Select an image to view its full item page.
Click the download icon in the upper right corner.

Agree to the terms and conditions and download your image!
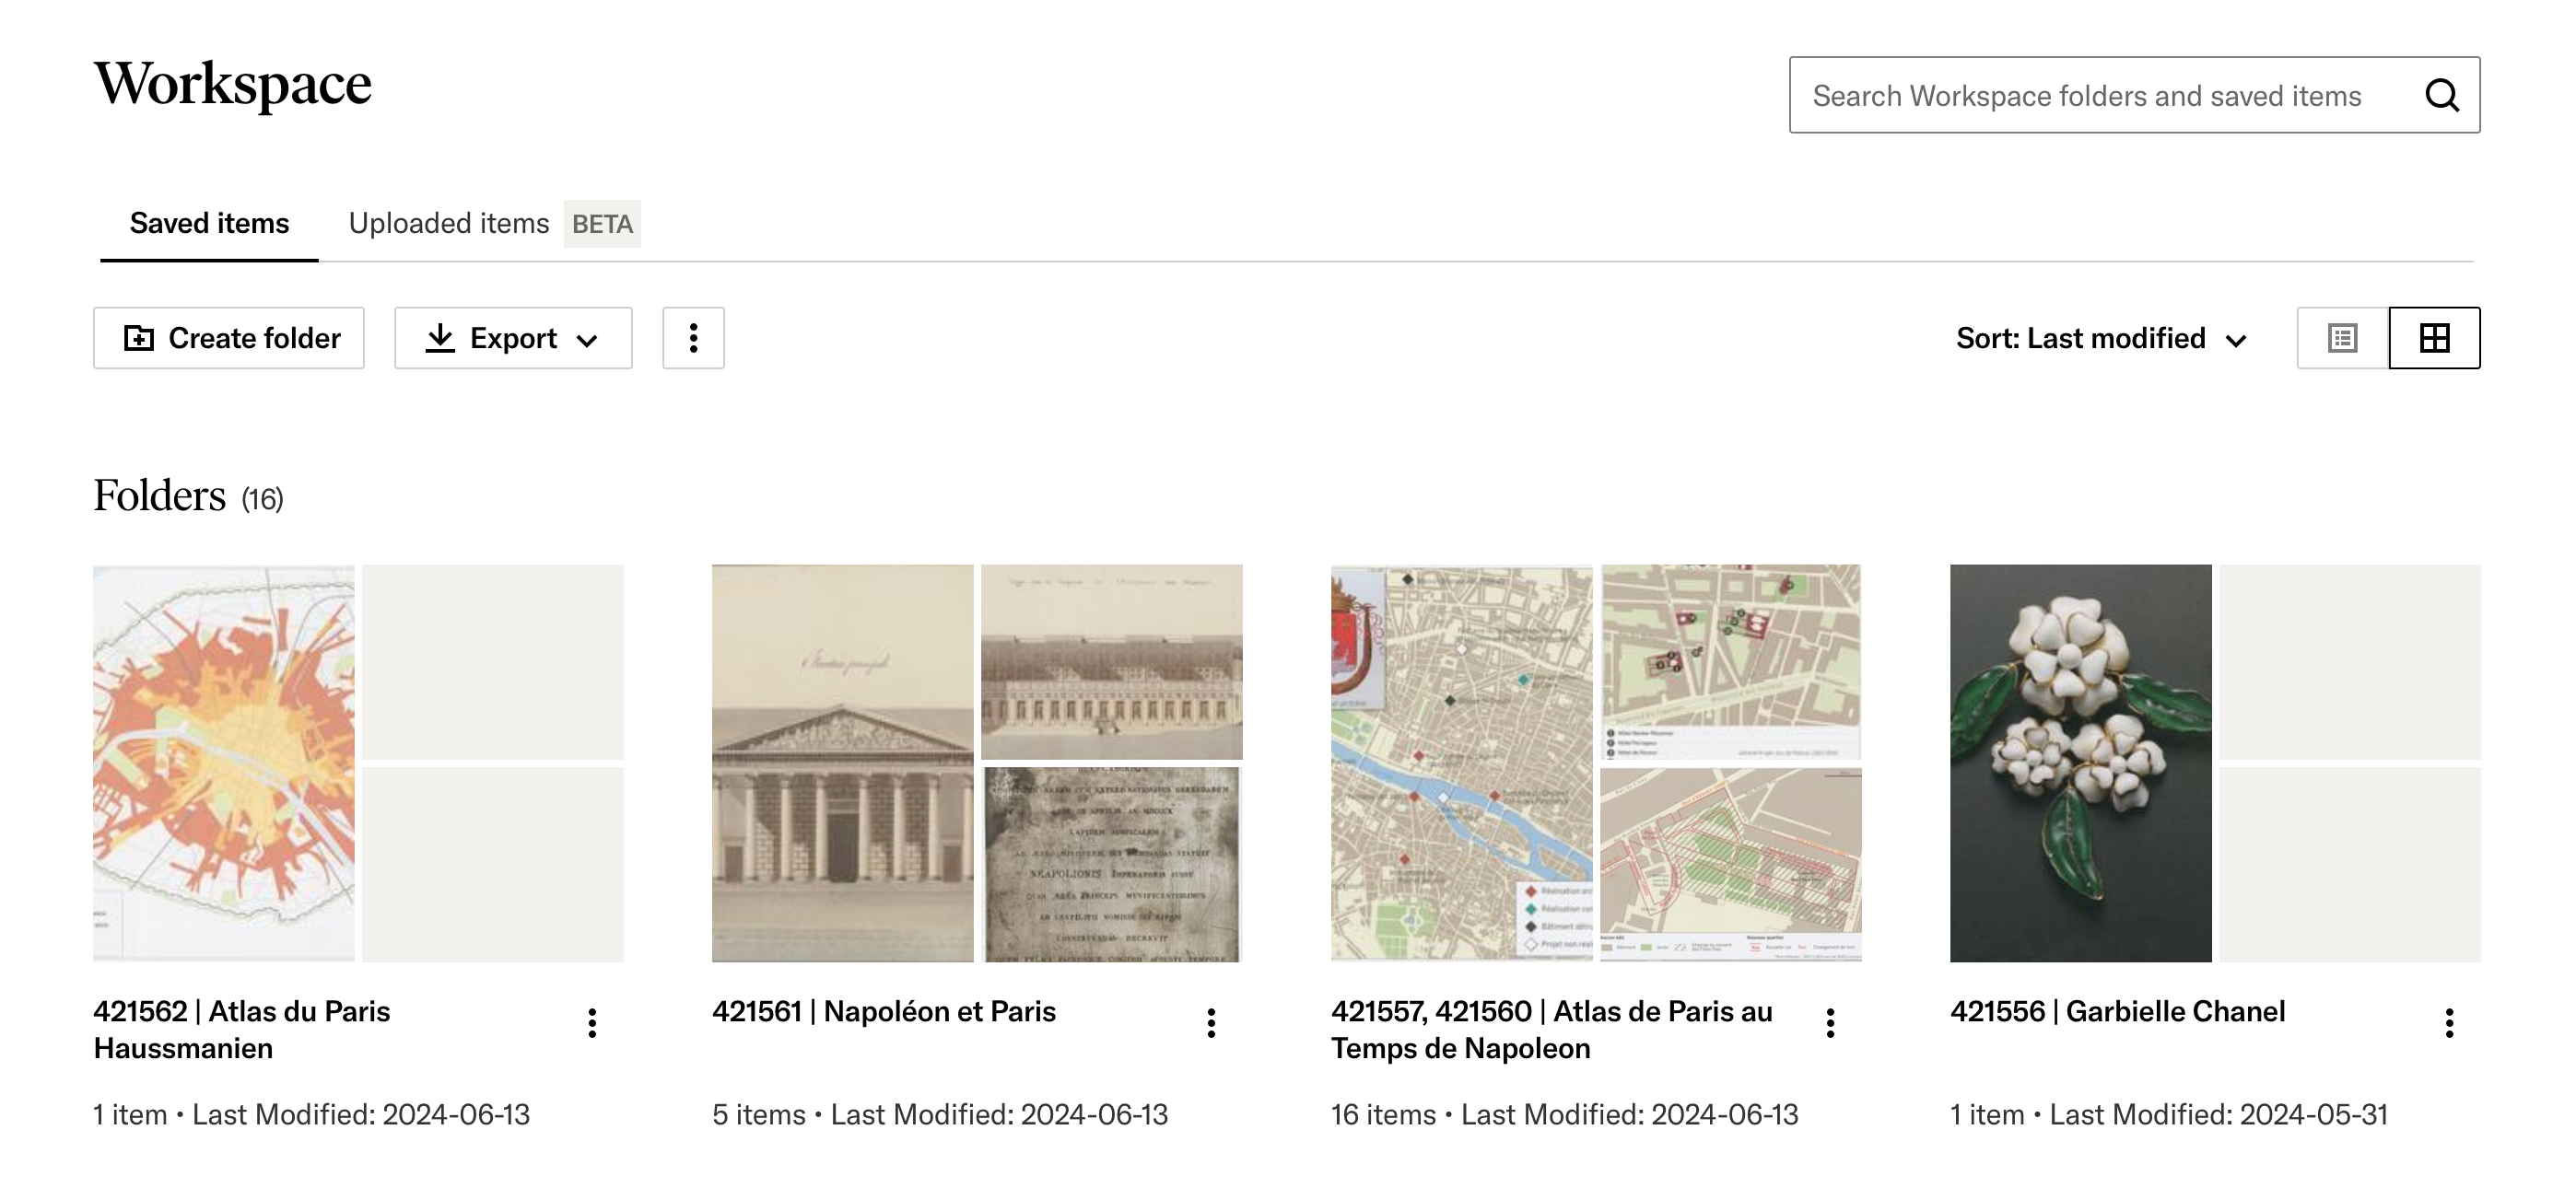
Using Workspace
When you register for a personal JSTOR account, you’ll get access to your own personal Workspace. With your Workspace, you can:
- Save what you find on JSTOR, including articles, book chapters, images, and primary source materials
- Organize research
- Add your own notes to items you’ve saved
- Export research as reference lists or presentations
- Present research in full screen mode
- Share folders with other members of your institution
To use Workspace, you need to register for a personal account. Follow the steps at the top of the page to create an account and link to to Smith College. Once you log in to your personal account, select the Workspace icon in the main navigation bar at the top of the page.

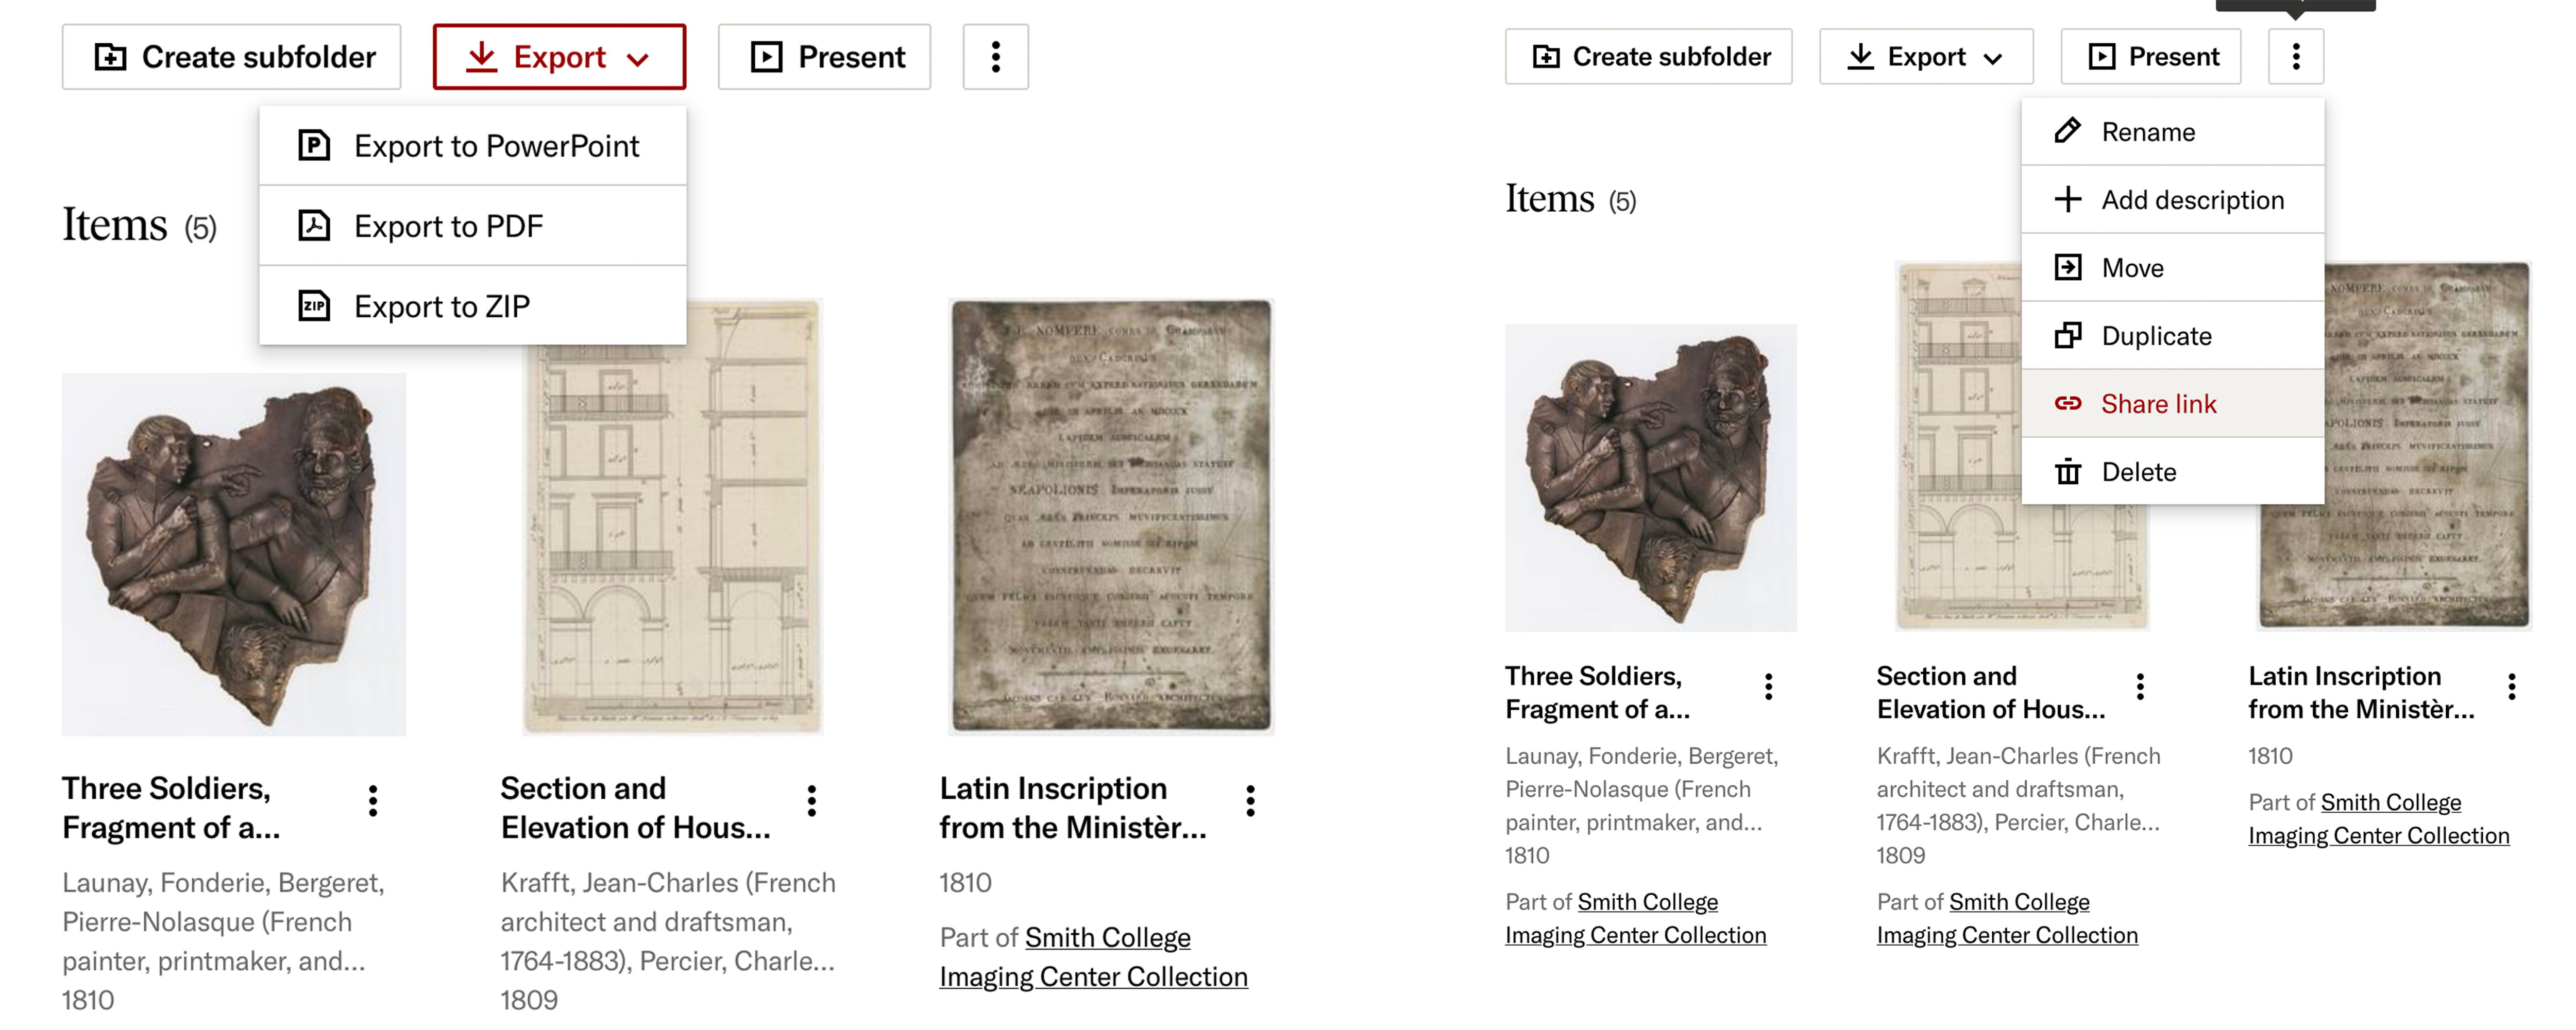
Creating Folders
Click the Create Folder icon, choose a name for your new folder, and then click create. You can create a sub-folder within your folder by entering the folder and clicking the Create Subfolder icon. Click the three dot icon next to the title of your folder to rename your folder, add a description, arrange it within your workspace, or export its contents to your desktop.
Saving Items to Workspace
On the item page for an image, click the Save icon on the right-hand side. You can choose to save the item directly to your workspace, to an existing folder, or create a new folder for the item.
Sharing and Exporting Workspace Folders
- Click on the Workspace folder you’d like to export. Click the Export button to download the folder as a PowerPoint, PDF, or set of image files.
- To share your Workspace folder, click on the three-dot icon and select the Share Link option.