Starting Tethered Capture
- Prepare your photography setup and plug your camera into the computer (for instructions on a common tethered capture setup, view Documenting your Artwork – Using the Copystand).
- Open Lightroom Classic and select File > Tethered Capture > Start Tethered Capture…
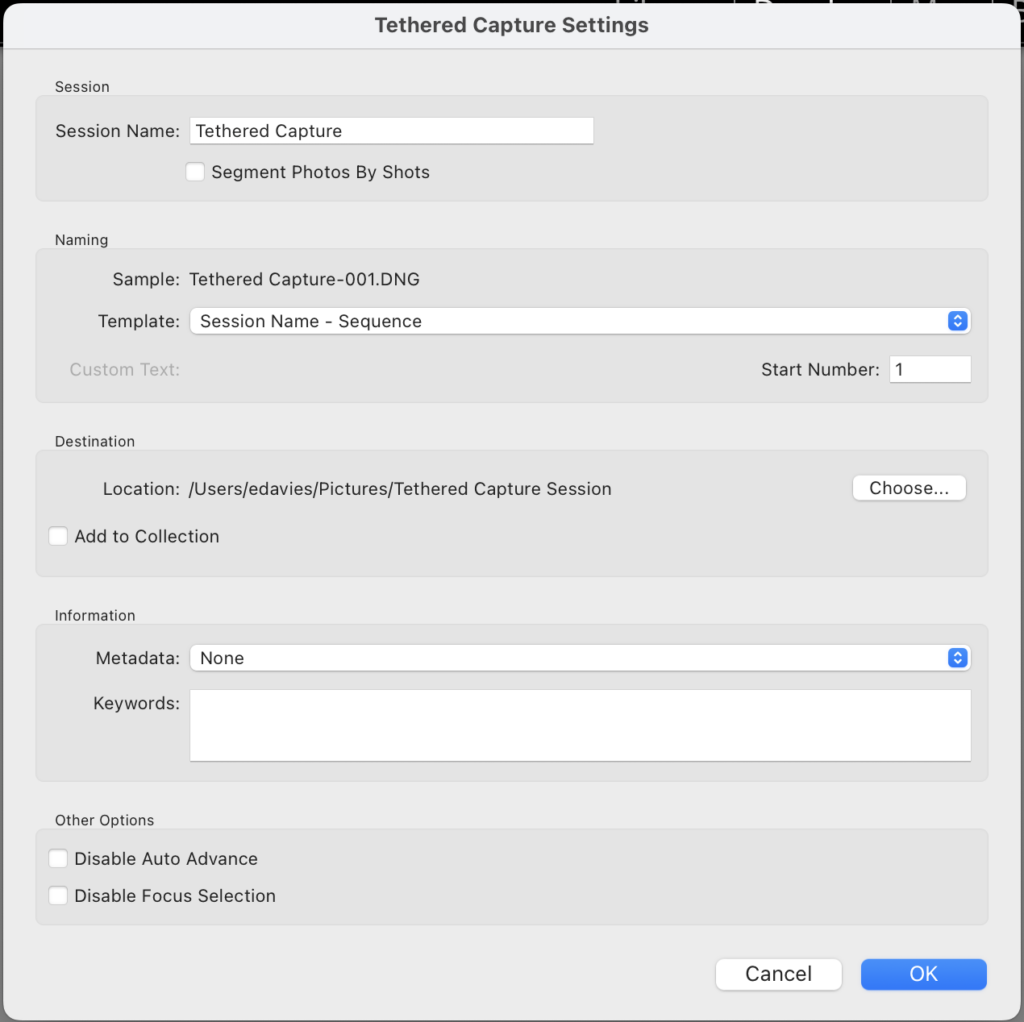
- When the tethered capture settings window opens, set your session name, filename sequence, and the destination for your RAW captured files. Then, click OK.
- The tethered capture control bar will load and automatically recognize your camera.
Capturing the Images

- You can use this control bar to toggle between manual and auto focus, adjust your shutter speed, aperture, ISO, and white balance.
- Click the Live button to open the live view window. This window will give you a preview of your image based on your setup and camera settings.
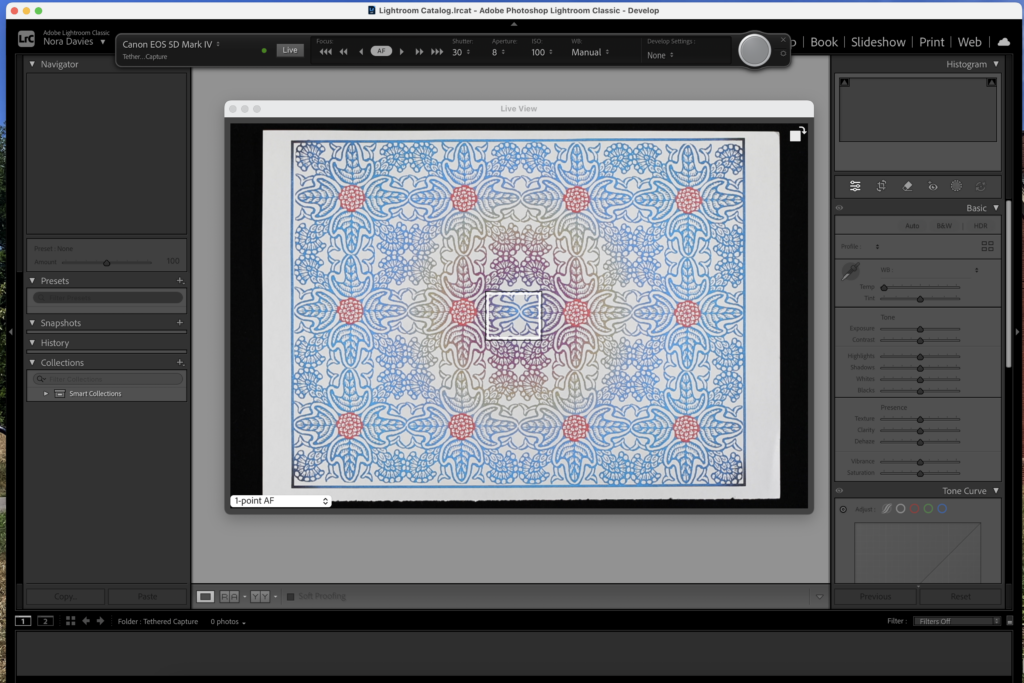
- You can also use Develop Settings to apply a set of image edits automatically to every image captured.
- Click the large circular capture button on the rightmost side of the control bar to capture the image.
- As the images are captured, they will be added to the relevant folder in your Lightroom Classic Library.
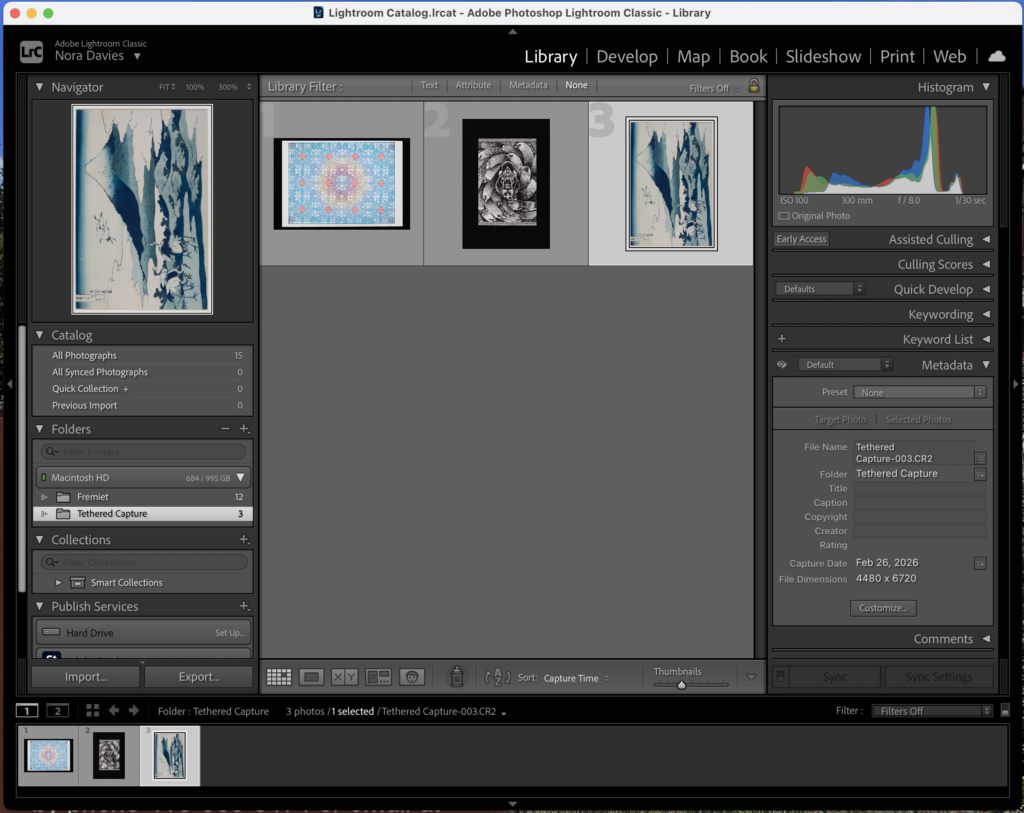
Editing the RAW Images
Lightroom Classic captures your images as RAW files and saves them to the location you chose in the tethered capture settings menu.
When a photograph is taken and saved as a RAW file, all of the information from the camera sensor is recorded. This is different from a JPEG or TIFF, when the camera decides which information to keep or discard to create the file.
In Lightroom Classic, like Adobe Camera RAW, you can perform non-destructive edits to your images individually or in batch. These edits are reversible and the RAW files will remain unchanged in their original location.
To start editing, navigate to the Develop window in Lightroom Classic.
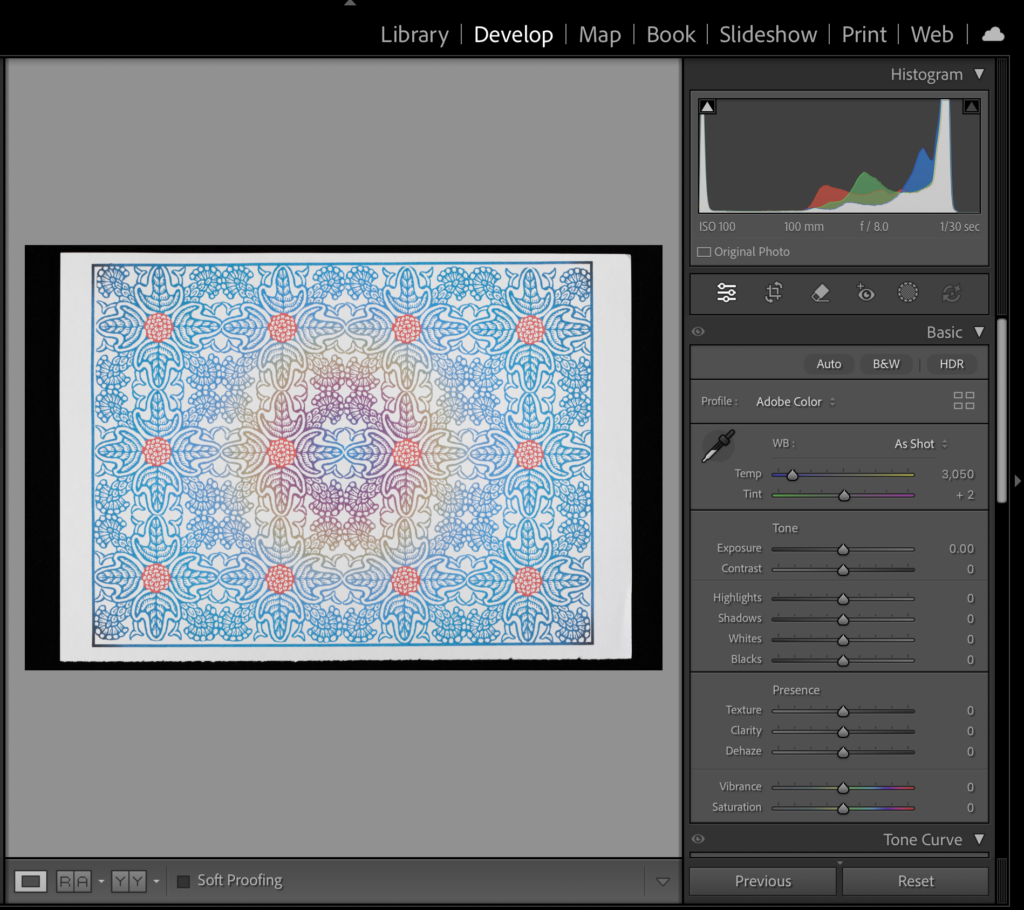
Basic Settings
White Balance
To adjust the white balance, click on the eyedropper and use it to click on an area of the picture that you’d like to appear white or light grey.
Tone
Use the Exposure slider to brighten the highlights in the image or Contrast to adjust the difference between the highlights and shadows.
Use the Hightlights, Shadows, Whites, and Blacks sliders to fine-tune the light and dark tones of your image.
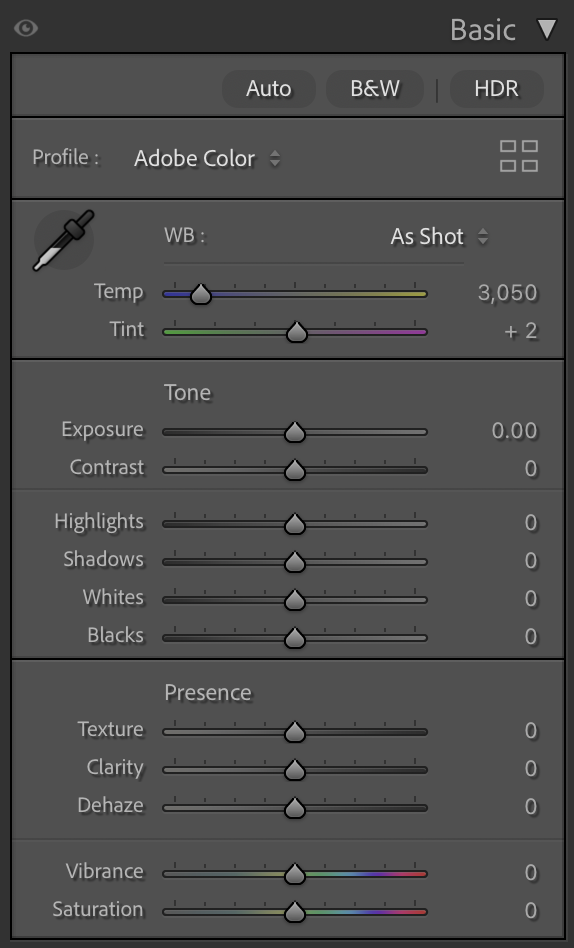
Presence
The Texture slider can be used to smooth or accentuate details in the image.
The Clarity slider sharpens or softens the image by adding or removing contrast to all the mid-range tones.
The Dehaze slider adjusts the image contrast and color saturation to remove or add atmospheric haze, fog, or mist.
Vibrance allows you to increase the saturation of colors that appear washed out in an image, but protects already bright colors from becoming over-saturated. Saturation globally increases color saturation across the image.
Tone Curve

The tone curve can be used to adjust the brightness and contrast of a specific part of an image.
Drag the diagonal line up to brighten or down to darken specific tones, based on where you click.
You can drag one part of the line up and the other part down to create an “s-curve,” this enhances the contrast in the image.
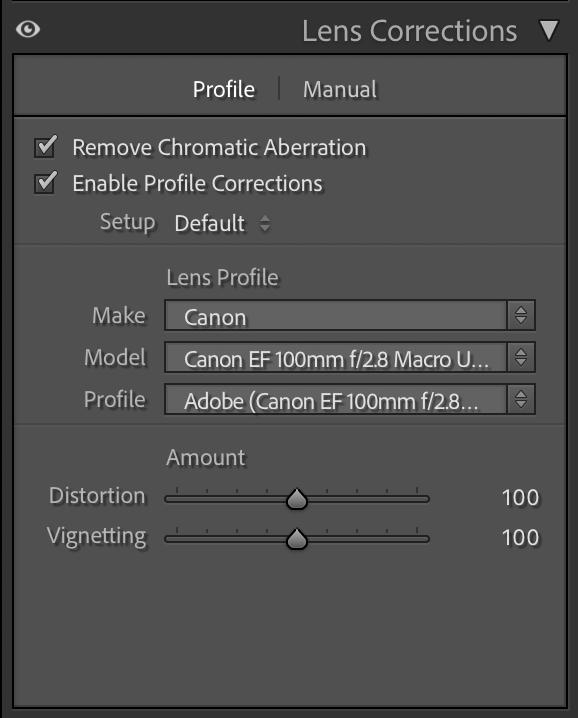
Lens Corrections
Always check the Remove Chromatic Aberration and Enable Profile Corrections boxes.
These settings will automatically detect the make, model of your camera lens and compensate for any warping from the lens itself.
If it doesn’t detect your lens, you can manually select the relevant lens profile.
Spot Removal
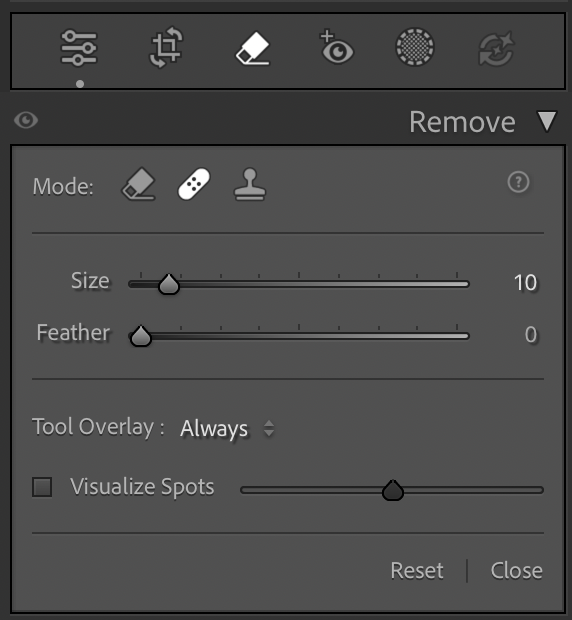
To remove spots, blemishes, dust, or other artifacts from your image you can use one of three tools.
The Eraser tool removes pixels and makes them transparent or replaces them with a background color. The Spot Healing tool samples surrounding pixels to blend over the selected area.
The Clone Stamp tool can be used to manually select a group of pixels and “stamp” it over the blemish.
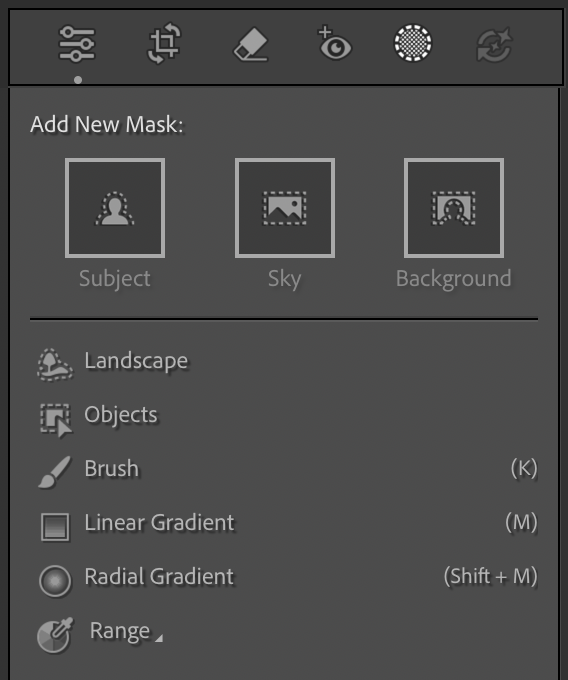
Masks
Adjustment masks allow you to make changes to the tone, saturation, and sharpness of selected parts of your image.
You can use the Brush tool to manually select and area to adjust or use the automatic tools to select the subject, background, or specific objects within the image.
The Gradient tools can be used to apply an adjustment that fades out from a selected area.
Exporting and Saving
To finalize your image edits, you’ll want to export and save your images. This will create a folder of image files, separate from your RAW files, of whatever file-type you choose when exporting.
- First, select all the images you want to export from your Lightroom Classic Library. You can select all of them by clicking on the first image, then holding
- the Shift key and clicking the last image.
- Select File > Export…
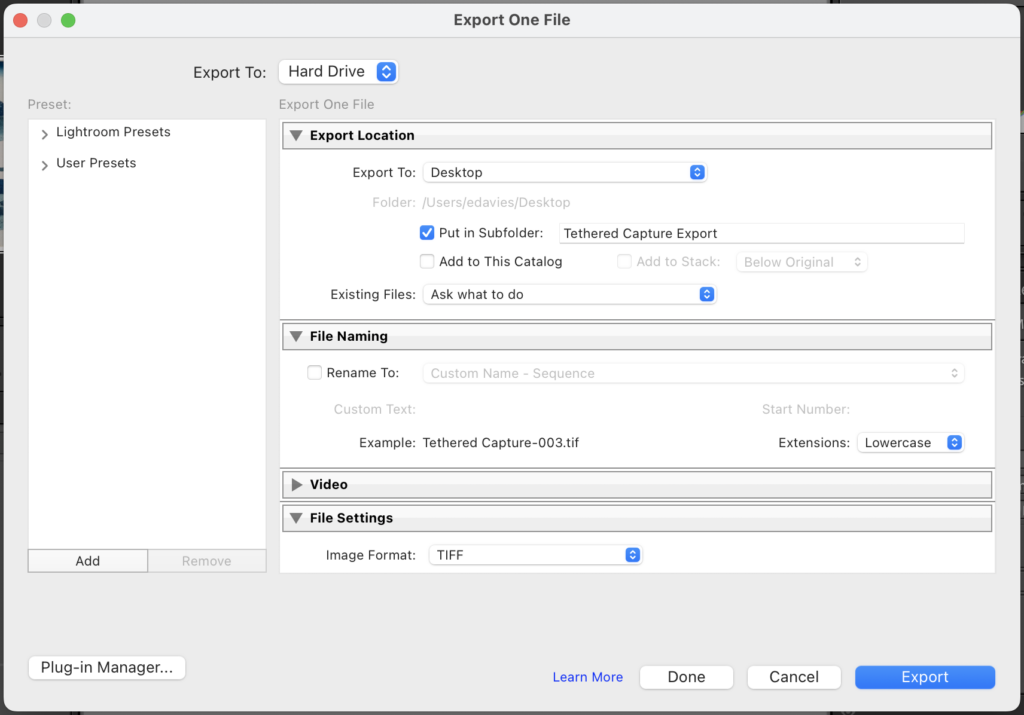
- When the export window opens, you can choose where you want the files to be saved. You can also store them in a new or existing folder using the Put in Subfolder option.
- Using the File Naming settings, you can rename all of your files in the order that they appear in the Library. Use the drop-down menu to choose a custom name, or rename by creation date or sequence. Choose the Edit… option to create a custom combination of all these options.
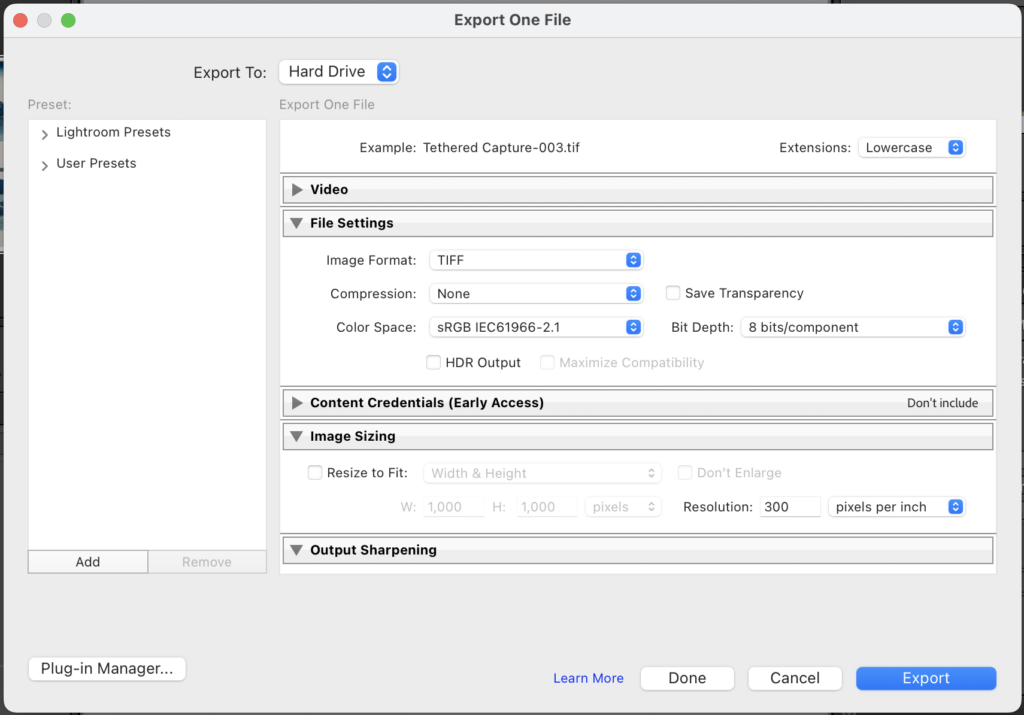
- Use the File Settings to choose the image format (i.e. TIFF, JPG, PNG) and relevant settings for that file-type.
- Use Image Sizing to set the resolution for your images (300 to 600 ppi is recommended) and/or resize all the images to fit within certain dimensions.
- Once you’ve chosen your export settings, click the Export button and the images will save to the location you specified.