If you wish to use the 3D printer in the Imaging Center please contact Andrew Maurer or Noah Thompson and share your sliced file via ic-u@smith.edu. We will review your model and set up a time to meet with you to print it.
Preparing a Model with Bambu Studio
Bambu Studio is free to download and gives you access to an open source library of 3D models. You can also make your own models or upload ones you found elsewhere.
- To get started, open Bambu Studio. Click on the “Prepare” tab to bring up the settings and plate preview. The plate is where your model will be printed.

2. You’ll need to select the printer and plate. Our printer is the Bambu Lab X1 Carbon and it has a Textured PEI Plate.
3. Most of the settings will stay the same, but you will need to select which filament you will be using. Typically you will select “PLA Basic.”
4. To add a model, click on the cube icon with the plus button above the plate preview.
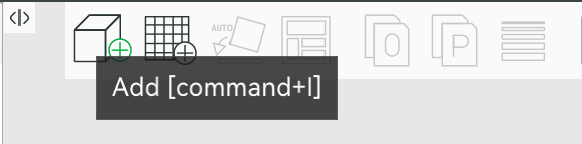
5. Select your model from the desktop or hard drive and it will be uploaded to the software. You should see it appear on the plate.
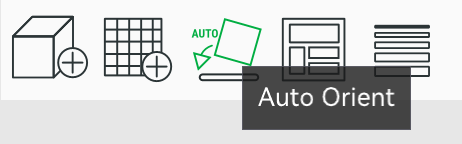
6. If you are unclear about how to arrange your model on the printing plate, click the “auto-orient” button and the software will attempt to find the best orientation. If your model has multiple pieces, this step will orient all of them.
7. The software may prompt you to add support structures if you have a piece that floats or isn’t supported on all sides. These small supports prevent the filament from dropping or becoming misshapen, and can be easily broken off once the model is printed.

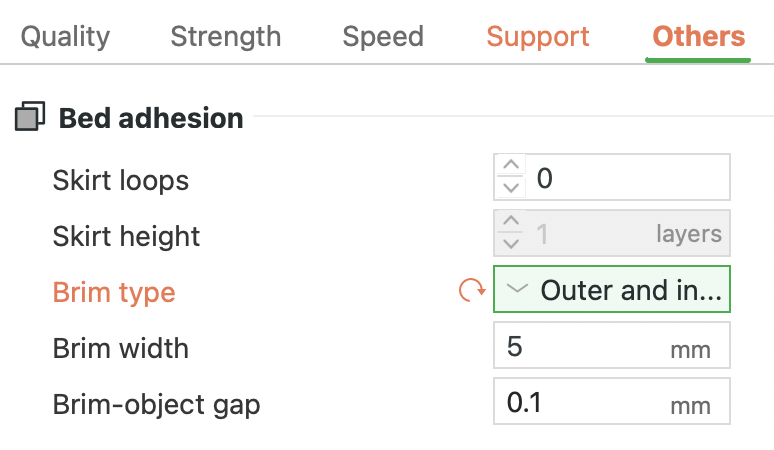
8. Optionally, you may choose to include an adhesive brim around the base of your model. Do this if your model has relatively little surface in contact with the build plate, as would be the case with a freestanding vertically-oriented wall.
8. Click on the “slice plate” tab in the upper right once your model is ready. The software will “slice” the model to determine how many layers of filament it needs to print. When slicing is complete, you will see a box showing how long it will take to print your model.
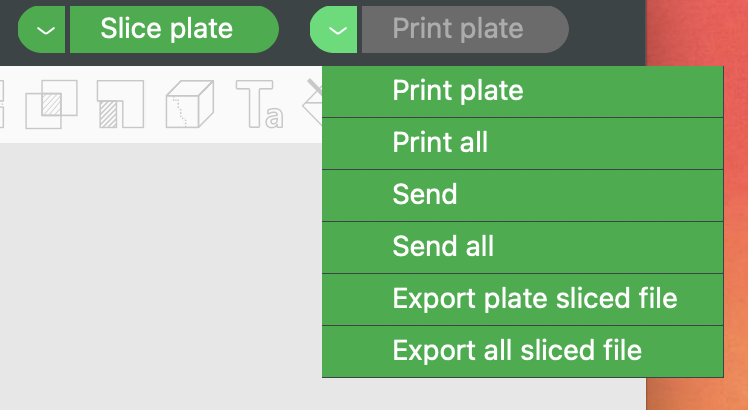
9. You can’t print directly from your computer to our 3D printer, so once the model is sliced you can export each individual piece or the entire model in a single file. Click on the drop down arrow next to “Print Plate” and select “Export plate sliced file.”
9. If you are printing on your own, you could export your file to a microSD card. Otherwise, this is the file to send to the Imaging Center. If you are printing on your own, continue with the instructions below.
Printing
1. Press the button on the front of the printer to show the home screen. If the printer is completely off, you may need to turn it on by flipping the switch on the back bottom right.
2. Insert the MicroSD card, then tap on the folder icon to bring up the files on the card. Select your model, and select the color of filament you want to use to print. To see which colors are available, look at the spools of filament on top of the printer.
3. Confirm your selections and the printer will start warming up.
4. The printer will expel leftover filament in the nozzle and calibrate the plate to make sure the surface is even. Once the printer is warmed up it will start putting down the layers of filament. The home screen will show the model, temperatures of the printer and nozzle, as well as the printing progress in percentage, number of layers printed, and the estimated time left.
5. Printing can be paused, and if the printer runs out of filament it will only resume when another spool has been put in. It is recommended to print when you’ll have enough filament on the spool to complete your project and avoid interruptions or having to start over.
Note: Sometimes the printer will “spaghetti,” an error where new plastic fails to adhere to an existing foundation and filament starts to pile up and look like noodles. This will cause the print to fail. This doesn’t happen too often, but check in periodically on your project as it prints!