This recreation was a little more difficult than the first one. If this is your first time doing embroidery, you might want to find a few tutorials online before starting this.
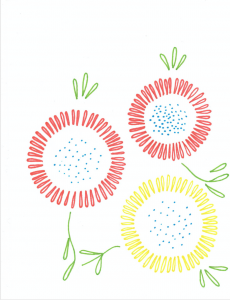
I made a pattern based on the embroidery on the original apron. You could do a similar design (or copy my pattern) or draw another simple design onto paper.
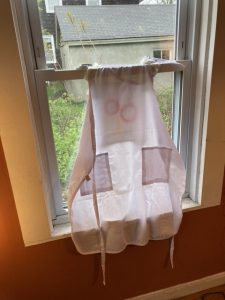
Then I traced the design onto my apron with a colored pencil. Since my apron fabric. was light colored, I used a window as a lightbox and taped the pattern and the apron up to the glass.
Once my pattern was transferred, I could start embroidering. I had just four colors of thread, so I decided to repeat one of the flower colors, and I used one color for the inside of all of the flowers.
There are two main types of stitching in the original apron: the leaves and the petals are made from a detached chain stitch, and the small dots in the center of each flower are french knots.
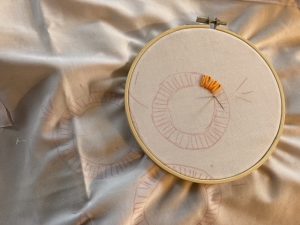
In the photo below, you can see the beginning of the chain stitch petals I made. For each petal, I brought the needle up from the back side of the fabric and then back into the original hole, making sure to keep a loop on the front side. Then, where I wanted the top point of the petal to be, I brought the thread to the front side of the fabric again, pulled it through the loop, and pulled the needle to the back side of the fabric again.
For the center of each flower, I did french knots, just like the embroiderer in the 1930s did. To make a french knot, bring your needle to the front of the fabric, wrap the thread two to three times around the needle, and then bring your needle back through the original hole while holding onto the thread and pulling it taut.
After I finished embroidering the flowers, I made leaves using the same chain stitch as the petals. Then, I ironed the apron, and I was done!
