To Customize your Menus
- Ensure you're logged into your site and can see the WordPress toolbar along the top of your site.

- If you don't see the toolbar, you might need to Log in to WordPress.
- From the top toolbar, choose Customize. The “Customizer” will open on the left side of the window.
- Select Menus. The “Customizing Menus” menu will be displayed.
- From here, you'll be able to create new menus, edit existing menus, and--for some themes--set your menu location.
Adding Items
- To add items to the list, select +Add Items. The “Search menu items” will be displayed on the right side of the toolbar.
- You can add several types of content:
- Custom Links
- Custom links are great for adding links to content outside of your site, or to add a label to a dropdown option your site's navigation.
- Pages
- You can add pages to your navigation once they're published
- Posts
- You can add posts to your navigation once they're published
- Categories
- Use categories to create a link that will take you to all of the posts in a specific category. It will automatically update as you add new content to that category.
- Tags
- Use tags to create a link that will take you to all of the posts in a specific tag. It will automatically update as you add new content to that tag.
- Custom Links
- Find the item you want to add and select its name. The “+” sign on the left side of the item will be replaced by a check mark and the item will appear at the bottom of the Menu list.

Creating Dropdown Menus
- Create dropdown menus in your navigation by clicking and dragging a menu item and nesting it under another item, or by using the Reorder option to nest your items.
- To create a dropdown menu that uses a label rather than a link, choose "custom link" and enter # in the link field, then enter the text of the title.
Removing Items
- To delete items from the list, click the X located on the right side of the menu order.
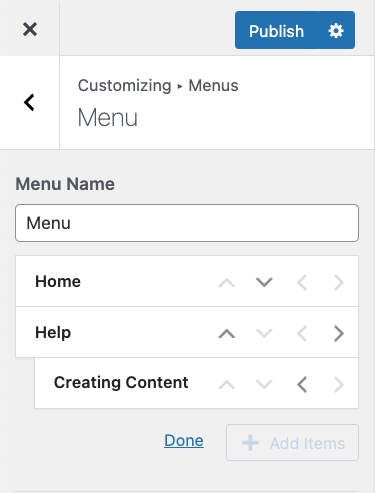
Reordering Menu Items
You can reorder menu items in two ways.
- Hover over the menu until you see the cross icon and drag and drop items to move them through the list.

- Choose Reorder. Arrows will appear next to your items. Use these to move menu items up and down or to indent to items and create drop down menus.
Setting Menu Locations
Some themes can display multiple menus, or change the location of the main menu.
- In “Customizing Menus,” under Menu Locations, select View All Locations.
- “Menu Locations” will be displayed. Different themes have different sets of locations where menus can appear. Some themes have one, others have more.
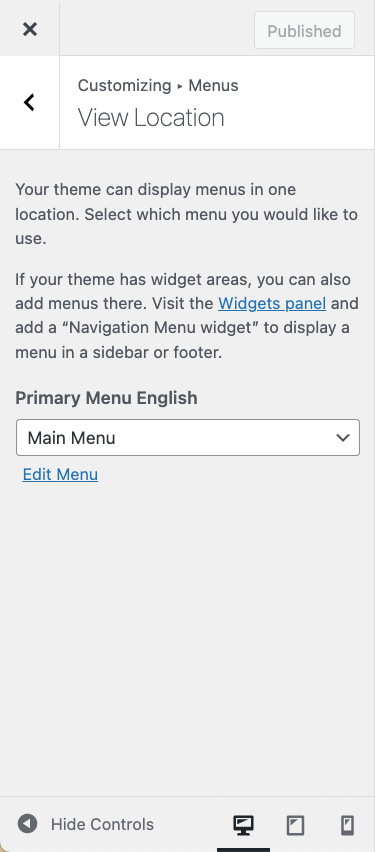
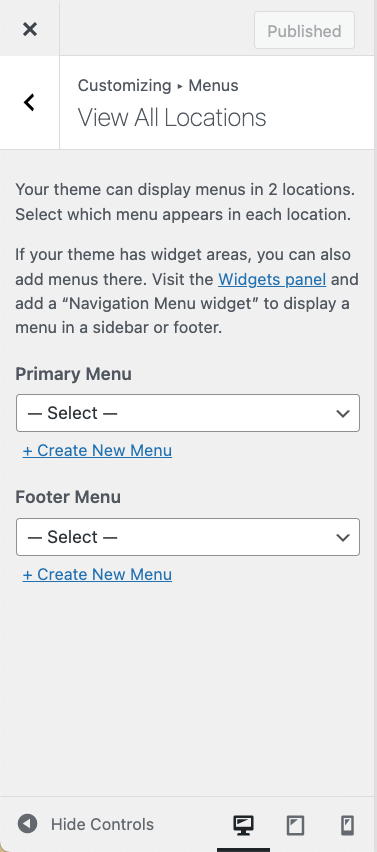
- In the “Navigation” drop-down menu, select the Menu you want to appear on the site.
- If you need to edit the new menu, follow the “Edit Menu” hyperlink that appears below the drop-down menu. Click Edit Menu to open the Menu Items editor.
Saving your Changes
If you used drag and drop to reorder the menu items, click Save at the top-left side of the page.
If you used the “Reorder” feature, below the Menu items, click Done.