H5P allows you to create images with “hotspots” – buttons that users can click to see additional information. This document will walk you through the process of navigating to H5P in the WordPress dashboard, creating an Image Hotspot content type, adding hotspots to an image, and adding your finished image to a WordPress post.
- Creating an H5P Image Hotspot
- Adding Content to an Image Hotspot
- Saving your Image Hotspot Content
- Add the Shortcode to the Post
Creating an Image Hotspot in H5P
- Navigate to the Dashboard of your WordPress site.
- From the main navigation menu on the left side, select H5P Content.

- Select the Add New button.

- A new page will open and display the H5P Hub.
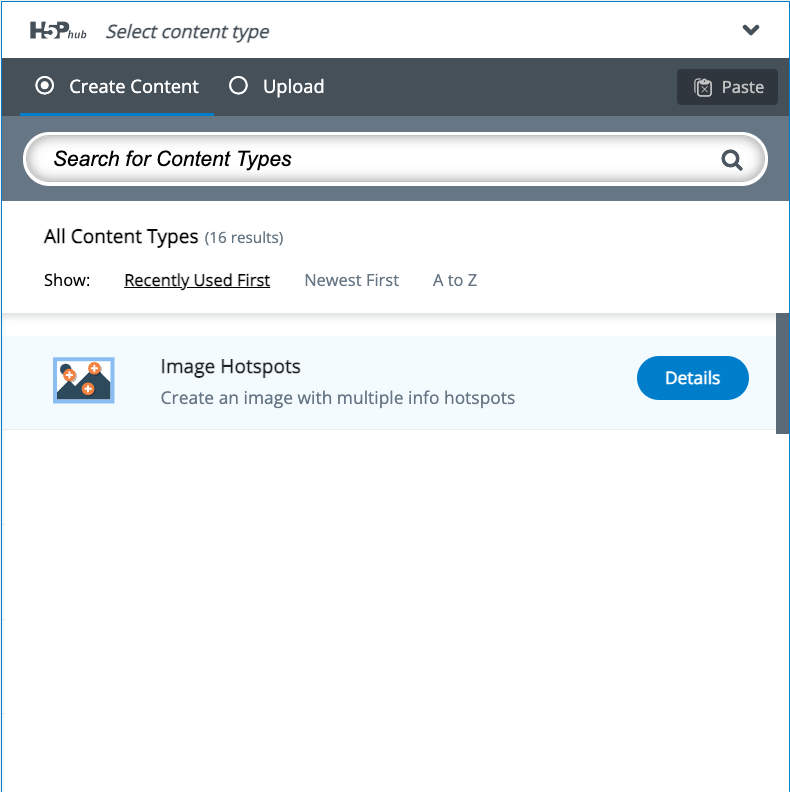
- Select Image Hotspots to open the Image Hotspots creator.
- On the Add New page, you’ll add images and text to create your interactive picture. There are three main sections you’ll need to fill out to create an image hotspot, a Title, your Background Image, and the Hotposts themselves.
Adding Content to an Image Hotspot
When creating an image hotspot, you’ll need to first choose the picture you want to annotate, and then choose where you want to add your annotations before you add the annotation information.
Adding the Background Image
In the first section of the content builder, you'll add a Title, your Background Image and alt text, and choose the icon and color of your hotspots.
- Title*:
- A descriptive title you’ll be able to recognize later. This won’t appear on your page, but it will appear on the list of H5P content.
- Tip: You can search the list of available content, so choose a title that will be easy to find, like your last name and a short description, e.g. “Smith – NY Daily News, Jan 22 1918” or "Smith – Assignment 1 Image"
- A descriptive title you’ll be able to recognize later. This won’t appear on your page, but it will appear on the list of H5P content.
- Background image*: The image you plan to annotate or add hotspots to.
- NOTE: Image suffixes must be in lowercase letters, eg. .jpg not .JPG
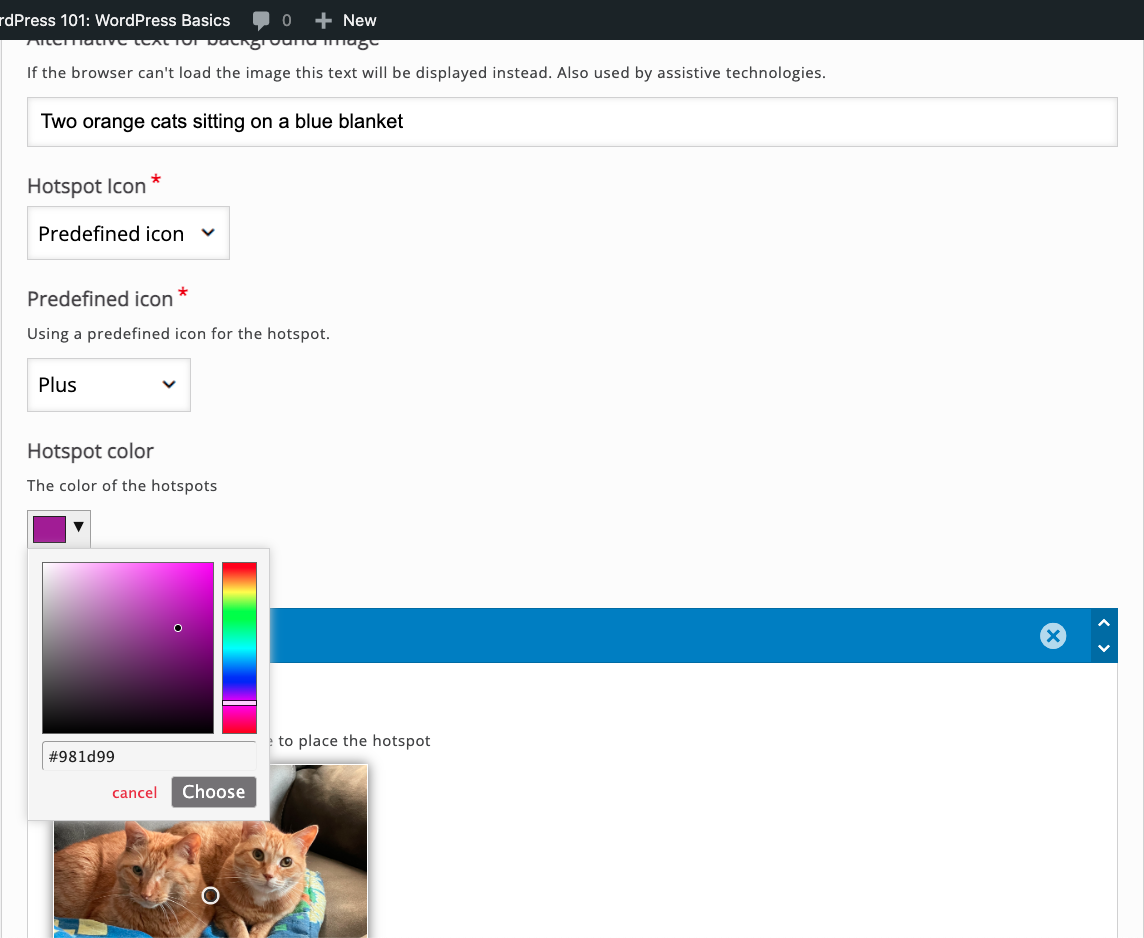
- Alternative text for background image: Alternative text is important for screen readers and other kinds of assistive technology. Type in a short phrase that describes your image.
- You can also read more about alt text.
- Hotspot Icon*
- Predefined icon vs Uploaded image - Use Predefined icon to use one of the 7 included options for your annotations.
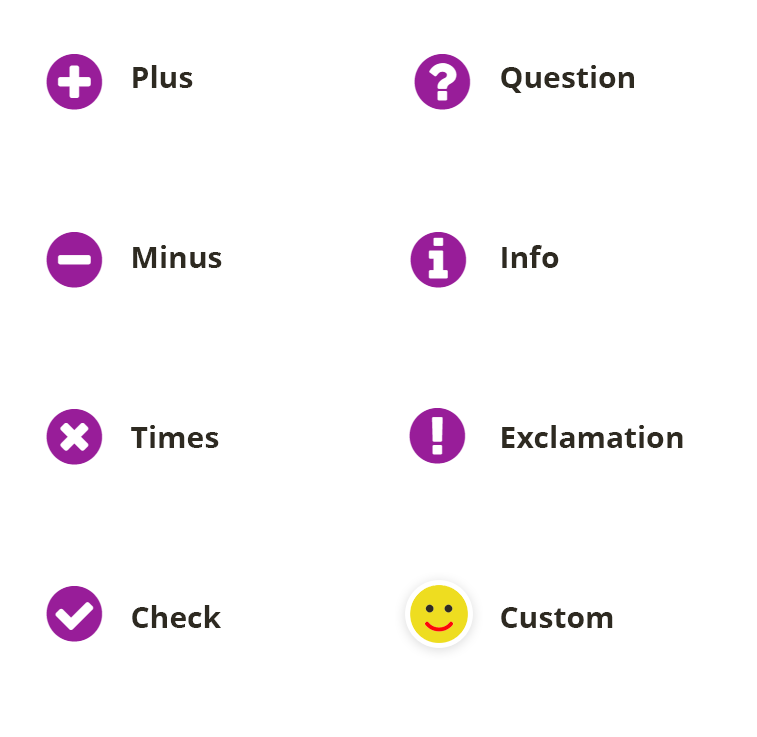
- If you’d like to upload your own icon, you can choose Uploaded image to upload an image of your choice.
- Want inspiration? Take a look at Free Media Sources for places to find free to use media.
- Hotspot color - This option changes the color of the hotspots. It’s a good idea to use a color that has a high contrast from the background image. Use a tool like Adobe Color Contrast Analyzer to find a likely color.
- Predefined icon vs Uploaded image - Use Predefined icon to use one of the 7 included options for your annotations.
Adding the Hotspots
Each hotspot is added individually. First, choose where your hotspot will appear, then add the text, image, or video you'd like to appear when the hotspot is opened.
- Hotspots*
- Hotspot position* - You will see a preview of your image. Click on the location you want to annotate to choose where your hotspot will appear.
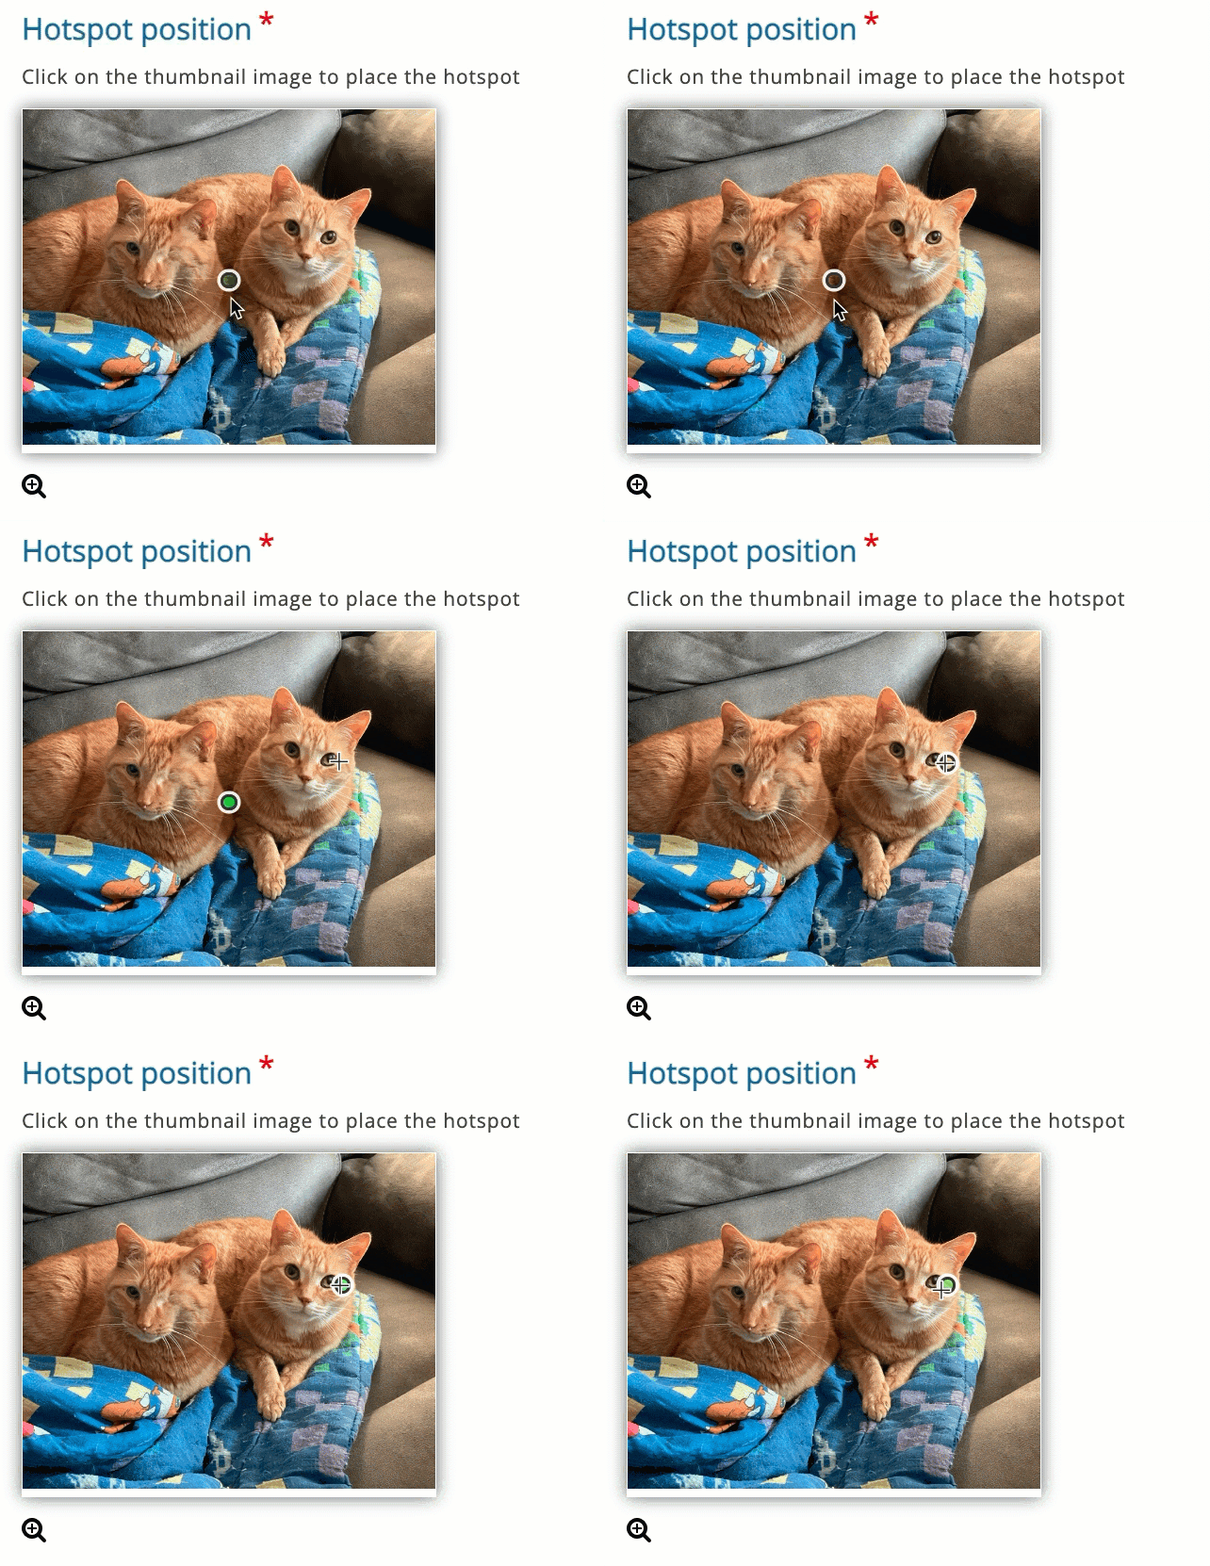
- Use the magnifying glass to open a larger preview of your background image
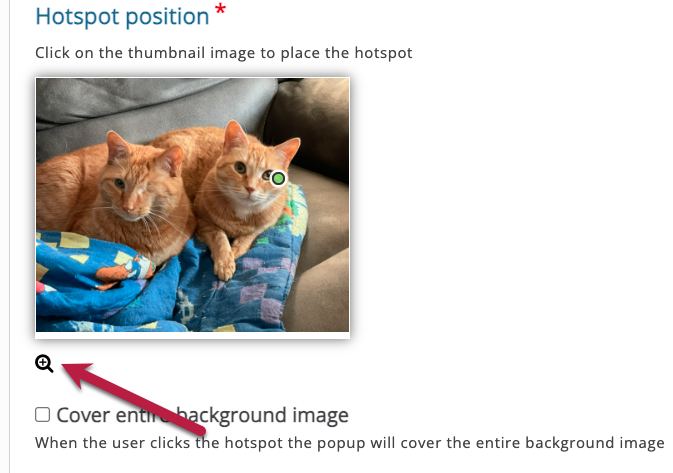
- Optional: Check Cover entire background image if you want to have the entire image covered by your annotation when that annotation is selected.
- Optional: Header - Enter a title or description if you’d like the popup to have a title.
- Hotspot position* - You will see a preview of your image. Click on the location you want to annotate to choose where your hotspot will appear.
- Popup content*
- Content Item - Choose from Text, Video, Image.
- Add the text, image, or video content into the new fields.
- To add more than one content item, for example, text and an image, choose Add item.
- When you have added the content for your first hotspot, choose Add Hotspot.
- To add more hotspots, select the Add Hotspot button at the bottom of the page to add a new hotspot. Add your new hotspot information and repeat as needed.
Saving your Image Hotspot Content
- When you have finished creating hotspots, at the top-right side of the page in the Actions block, select Create.
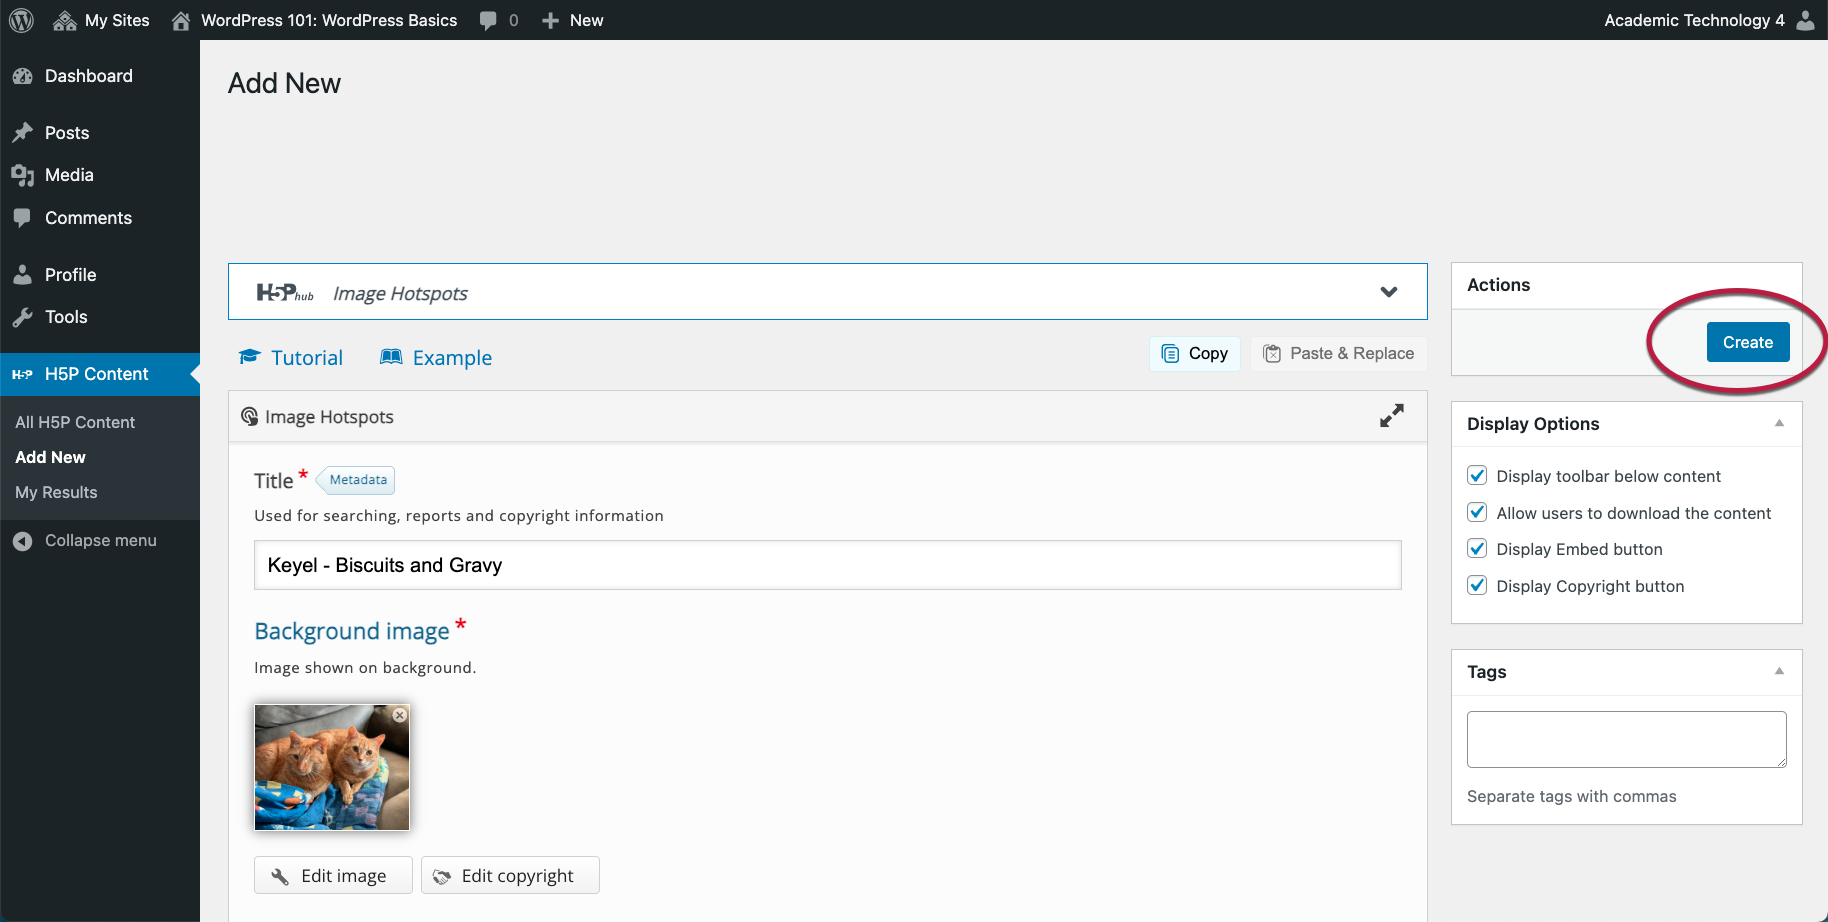
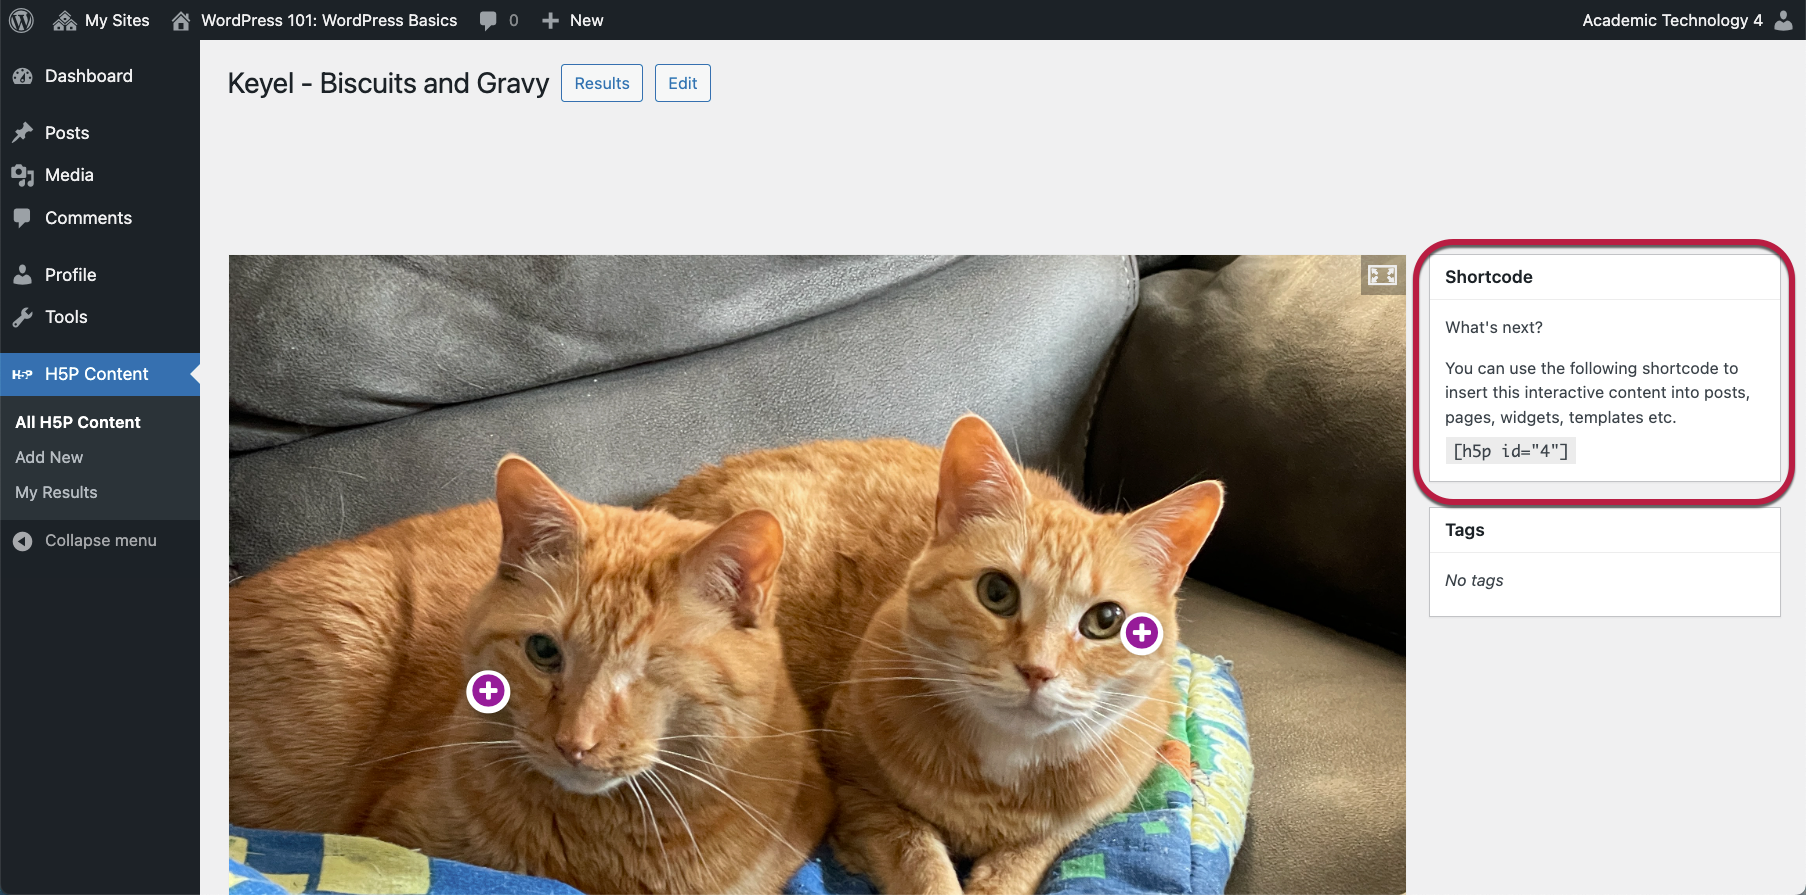
- The page will refresh showing the Image Hotspot final result on the left, and a Shortcode block will replace the Actions block on the right.
Add the Shortcode to the Post
The last step is to add the article to your WordPress post.
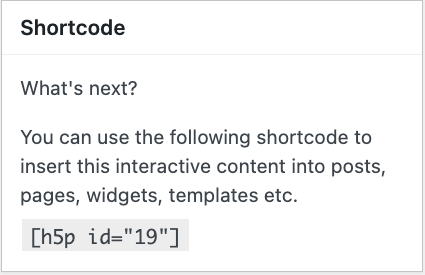
- Copy the short code displayed in the block in the top corner of your new iframe
- Navigate to the post or page where you would like to embed your article.
- In the Block editor workspace, add a new paragraph block wherever you'd like the Image hotspot to appear on your page.
- Paste the shortcode into the new paragraph block.
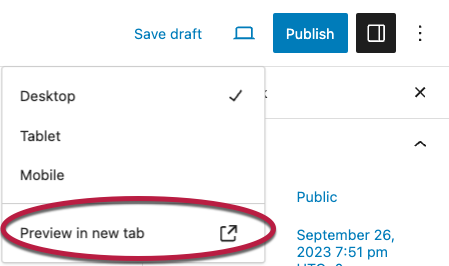
- To preview your new article, select the laptop icon from the top navigation bar, then select Preview in new tab.
- When you are finished adding content, choose Save draft or Publish to save your work.