


Folder contains…
Templates:
- Cover Template (7 x 7in, at least 16 pages): 7×7-perfect-bind-cover-template.indd
- Interior Template (7 x 7in) : 7×7-interior-template.indd
Job Options/Preset Files:
- Color settings: Bookmobile Color Settings.csf
- Creating your interior/cover PDF: Bookmobile PDF Job Options.joboptions
GET STARTED
- Download the BKX/PYX203_indesign_materials.zip folder from Google Drive which contains all of the template and preset files outlined above. IMPORTANT : Unzip this folder and move the unzipped version to your portable storage device.
☆ To unzip on a Mac, double-click on the zipped folder. Move the unzipped version of the folder to your storage device.
☆ To unzip on a Windows machine, right-click on the zipped folder → choose “Extract All…” → choose “Extract” → then skip any other messages. Move the unzipped version of the folder to your storage device. - NOTE : Please make sure you have a hard drive, flash drive, or folder to store *all* of your project’s files! It is critical to save everything in one place.
- Open InDesign:
☆ To find InDesign on a Mac, hold down the command key and the spacebar to bring up Spotlight Search → type in “InDesign” and hit return.
☆ To find InDesign on a Windows machine, search for “InDesign” at the bottom of the home screen. - Once the sign in screen appears, select “Continue with Google” → first enter your complete @smith.edu email address → then when directed to the Smith SSO screen, login with your Smith username (without the @smith.edu) and password.
LOAD IN PRESETS
- Once InDesign opens, go to Edit → Color Settings… → select Load… → navigate to the folder of templates and presets → select Bookmobile Color Settings.csf → click OK.
- Now, go to File → Adobe PDF Presets → Define… → Load… → navigate to the folder of templates and presets → select Bookmobile PDF Job Options.joboptions → hit Done.
All set to get started editing!
CREATE YOUR COVER
- Locate one of the cover template files (that matches the size of your book) and open it. This template is set up as 3 pages arranged in a spread (back, spine, and front).
- Once open, go to File → Save as… → give this document a new name and save it in the same folder as the rest of the resources. Always preserve the templates by saving your work as a new InDesign document.
- Make all of your design in the “Your Artwork” layer of the template file, do NOT place your materials in the “Template Guides – TURN OFF” layer.
- Design your cover keeping in mind the placement of the barcode etc.
☆ WORKSHOP 1 NOTES (FEB. 13, 2026)
CREATE YOUR INTERIOR
- Go to File → New → Document.
- Once open, go to File → Save as… → rename this project and save it in the same folder as the rest of your project.
- Copy/paste your text inside, edit according to your style and content. You can also drag and drop a Word document directly into one of the text boxes.
☆ WORKSHOP 2 NOTES (FEB. 27, 2026)
CHOOSING A FONT
For the body text, serif fonts are best and more easily trackable when the text is dense. Keep font size around 10-12-point, don’t go smaller than 10-point. Some popular body text fonts are:

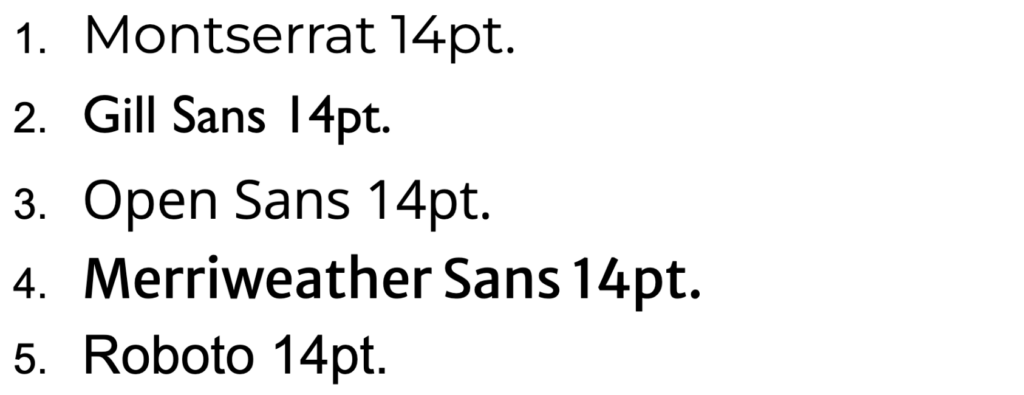
For titles and headings, you can go with a sans serif font, in order to create more visual interest and to clearly identify a new section. Make it stand out with a larger font size, typically around 14-point. Some popular title and heading fonts are:
Whichever combination of fonts you choose for your chapbook, make sure it is easily readable and complementary. If you need some design inspo, check out fontpair.co.
BEFORE EXPORTING: ADJUST THE COVER’S SPINE WIDTH
First, calculate the spine width using this formula:
Spine width in inches = (# of interior pages / 444) + 0.06 in * round this to the 4th decimal *
Then, adjust the spine margin in the .indd template file accordingly (see video tutorial here) :
- Go to Window → make sure that Control is checked on ✓ (displays Control Bar at the top).
- Next, go to Window → Interactive → Liquid Layout (opens Liquid Layout panel, you may drag that to the side of the screen).
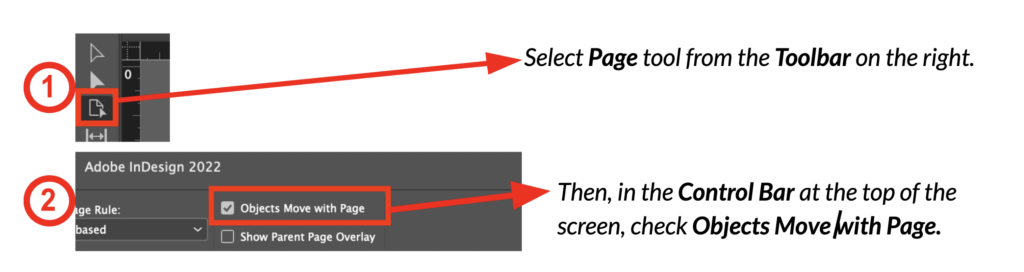
- In the Toolbar, select the Page tool → then go to the Control Bar (which will update with options for the Page tool) → ensure that Objects Move with Page is checked ✓:
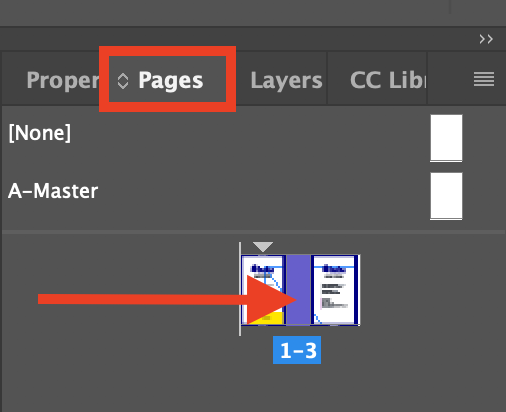
- Go to the Pages panel → double-click on the middle “spine” page (should highlight the spine page).
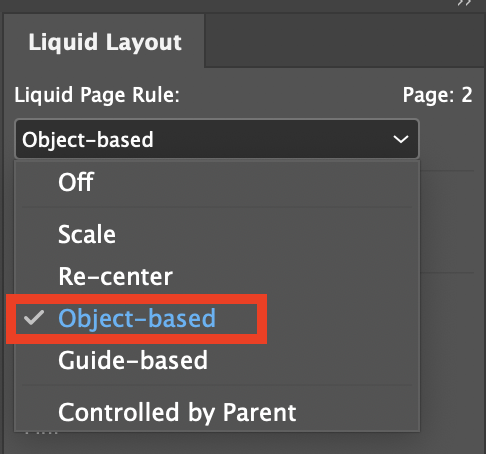
- Go to the Liquid Layout panel → in the Liquid Page Rule dropdown menu → choose Object-based.
- In the Control Bar’s width box (W:) → type in your newly calculated spine width → hit Enter.

- Done! The spine page in the center of the spread should adjust with the new width, subsequently adjusting the width of the entire spread.
EXPORTING THE INTERIOR
Once you have finished the design and format, you now need to export a PDF of the interior according to the Lulu recommended job options:
- Make sure to have loaded in the presets before continuing to the next instructions.
- Go to File → Adobe PDF Presets → select Bookmobile PDF Job Options…
- Name this exported file, choose its location, and hit Save.
- You do not need to change anything here.
- Hit Export at the bottom of the window.
Done with the interior PDF!
EXPORTING THE COVER
Finish design and export PDF according to the preset job options:
- Make sure to have loaded in the presets before continuing to the next instructions.
- Hide the template layer by clicking the eye to the left of the layer’s name in the Layers panel.
- Go to File → Adobe PDF Presets → Bookmobile PDF Job Options…
- Name this exported file, choose its location, and hit Save.
- IMPORTANT: Where the options appear next to Export As → switch from Pages to Spreads.
- Hit Export at the bottom of the window.
Done with the cover PDF!