This page describes how to create any kind of H5P content and get a short code to share it on a WordPress page.
To create any type of H5P content
- Navigate to the Dashboard of your WordPress site.
- From the main navigation menu on the left side, select H5P Content.
- Select the Add New button.

- A new page will open and display the H5P Hub.
- Select the content you’d like to create. Need ideas? Take a look at these H5P examples (link opens in a new tab).
Saving your Content
- When you have finished creating your H5P content, at the top-right side of the page in the Actions block, select Create.
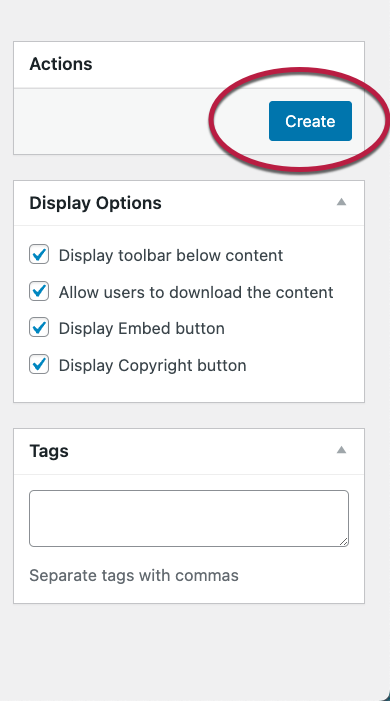
- The page will refresh showing the finished H5P content on the left, and a Shortcode block will replace the Actions block on the right.

Add the Shortcode to the Post
The last step is to add the article to your WordPress post.
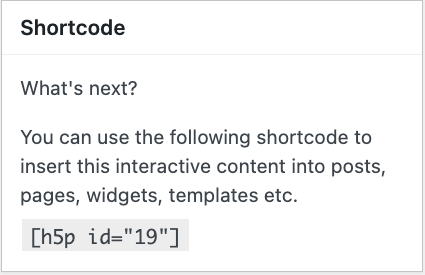
- Copy the short code displayed in the block in the top corner of your new H5P content.
- Navigate to the post or page where you would like to embed your article.
- In the Block editor workspace, add a new shortcode block wherever you’d like the Image hotspot to appear on your page.
- To add a new shortcode block, use the block inserter or in a new paragraph block type /shortcode to bring up the shortcode block.
- Paste the shortcode into the new shortcode block.
- To preview your new article, select the laptop icon from the top navigation bar, then select Preview in new tab.
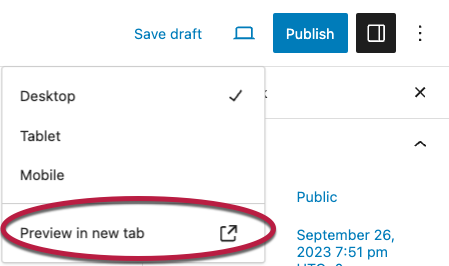
- When you are finished adding content, choose Save draft or Publish to save your work.