On this page, you will find some overall formatting tips as well as: text style (headings), bullets and numbering, hyperlinks, and table of contents.
Format Text in a WordPress Page or Post
Overall Tips and Considerations
Sophia and Blogs WordPress sites have different toolbars, however, the main option icons do not change. To easily access any option you will be using when editing a post or page, remember to activate the Toolbar Toggle to expand all the options available.


When cutting and pasting pre-existing text from a word-processing platform (such as MS Word) into WordPress, be aware that any formatting from that document may not translate to WordPress. It is advisable to cut and paste text that is as clean as possible, and format text within WordPress. Below are some ways to format the text on your post or page.
In order to get a hard return (or hard enter in PC) (i.e., when you press return to start a new line of text, WordPress will automatically put a space between the two lines), you must hold down the “Shift” key while pressing return (in Mac) or Enter (in PC).
Text Style
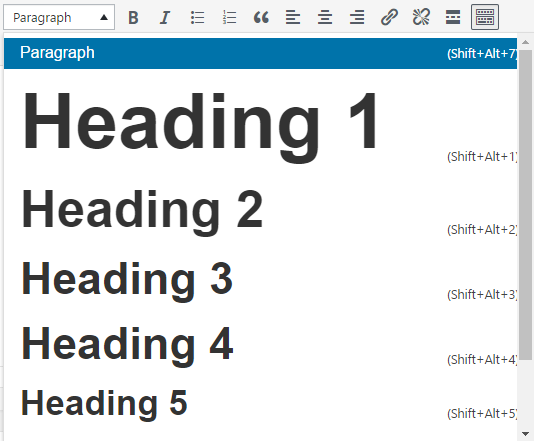
In WordPress, you can format in very similar ways to another word processing platform. For example, you can dictate whether the style of text is paragraph or different headings. If you plan to have many heading, to make your content accessible, it is highly recommended to organize them in descending order. To see more accessibility tips, see our document Accessibility guide.

Hyperlinks
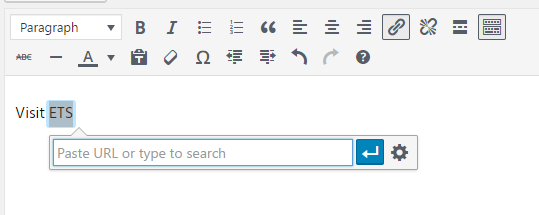
You can make the text interactive by inserting hyperlinks. Simply highlight a piece of text, then click the Insert/edit link button. The hyperlink menu will open.

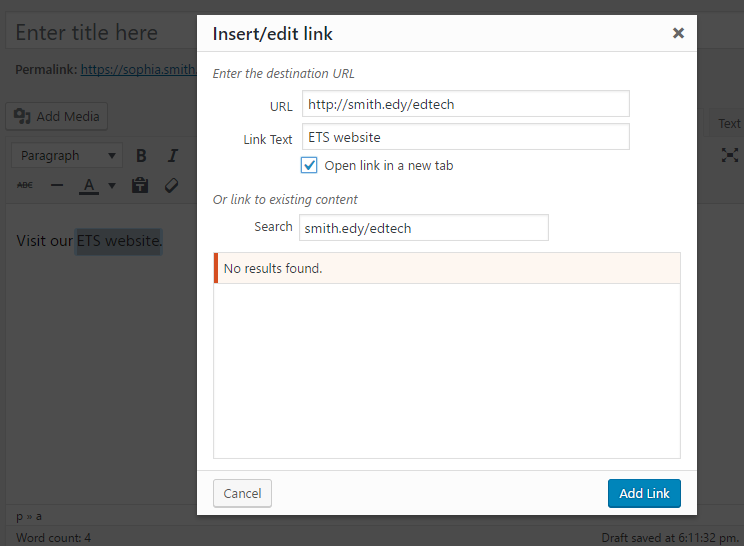
Click the gear icon. The and insert the Insert/edit link window will open. Paste the URL where you want the text to point in the URL field. The highlighted text will appear in the Link Text field. Unless the URL pasted is part of your website, it is recommended to check Open link in a new tab so that the user doesn’t navigate away from the page they are on.

At the bottom of the “Insert/edit link” window, click Add link to complete the creation of the hyperlink.
Table of Contents Using Anchor Points
In your post/page, create headings for each title you have. Then, at the top of your page/post create your table of content referring to each of the titles previously created.
After the headings and the table of content are created, in the “Publish” block, click Save Draft.
Note: if your page or post is published, click Update instead.
From the table of content, highlight one item and click the Insert/edit link icon as if you are making a regular link.
Click the gear from the pop-up message that will appear right next to your selection.
Scroll down to the bottom of the “Insert/edit link” popup window. The Headings should be listed as “places.” Select the Heading that corresponds to your selection. Click Add Link.
Repeat steps 3 to 5 until you have created all your anchor points. Then, to save your work, on the right side of the page, under the “Publish” block, click Save, Update, or Publish.
Activate Google Fonts in WordPress
Navigate to the Dashboard of your site.
In the “Dashboard”, on the left side toolbar, click Plugins. The “Plugins” page will open.
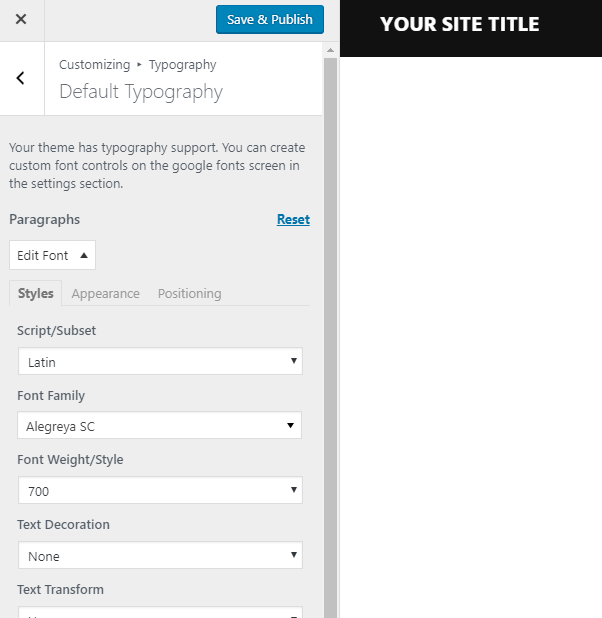
Note: To open the “Customize” menu, on your dashboard toolbar, click Appearance, then Customize.In the “Plugins” page, on the search bar, type Easy Google Fonts. The plugin will be displayed below. Click Activate. The Google Fonts will be available on the “Customize” menu under “Typography”. Through the customizer you can change fonts at different levels (e.g. Headings and Paragraphs). To confirm changes, simply click Save & Publish. The new font style will be displayed in the live version of your site.

Note: To open the “Customize” menu, on your dashboard toolbar, click Appearance, then Customize.
